
Bakery-Style Chocolate Cupcakes
I still remember the first time I bit into one of these cupcakes—rich, moist, and deeply chocolatey. It was one of those rare baking moments where you pause mid-bite, blink, and say, “Wait… did I really make this?” These cupcakes instantly earned a permanent spot in my go-to recipe list—not just because they taste like they came straight from a fancy bakery, but because they deliver that wow factor every single time.
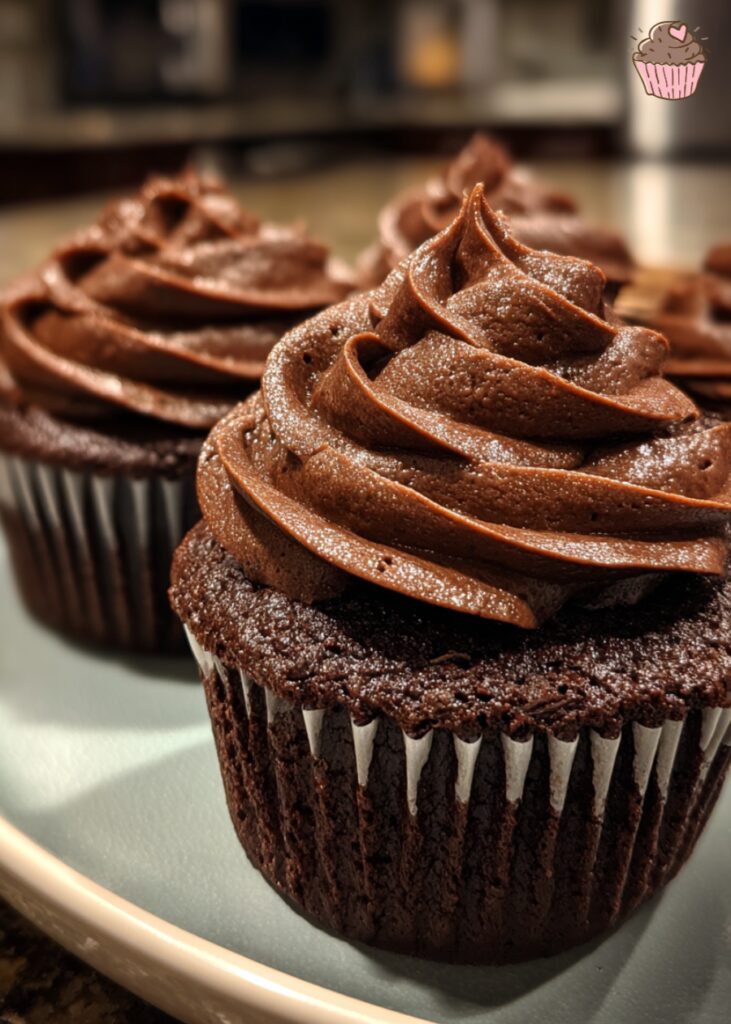
Whether it’s a birthday, a cozy weekend at home, or a last-minute sweet craving, these chocolate cupcakes never disappoint. The texture is soft and fluffy, the flavor is bold and satisfying, and they rise with the kind of perfect dome that makes you want to snap a photo before taking a bite (but good luck waiting that long).
And the best part? They’re totally doable. No complicated techniques, no fancy tools—just real ingredients, a little love, and a reliable recipe that I can’t wait to share with you.
What Makes These Cupcakes “Bakery-Style”?
There’s something magical about a bakery cupcake—the rich flavor, the moist crumb, the way it looks almost too perfect to eat. That’s exactly what I aimed for with this recipe, and here’s why it works so well.
First, the chocolate flavor: it’s intense and satisfying, thanks to a blend of high-quality unsweetened cocoa powder and a touch of brewed coffee to deepen the taste. No, they won’t taste like coffee—the coffee simply enhances the richness of the chocolate, making it bolder and more luxurious.
Then there’s the crumb: tender, soft, and ultra-moist without being dense. That’s all about balance. The combination of oil and buttermilk keeps the texture light and airy while locking in moisture for days. Eggs provide structure, and just the right amount of sugar gives them sweetness without overpowering the cocoa.
Let’s not forget the domed tops—those picture-perfect bakery crowns. The secret? A slightly higher initial oven temperature that helps the batter rise quickly before settling into that classic rounded shape.
And the aroma? Deep, dark cocoa with a hint of vanilla that fills the kitchen and makes it nearly impossible to wait for them to cool.
These aren’t just cupcakes—they’re the kind that make people ask, “Where did you buy these?” And you get to smile and say, “I made them.”
Ingredients Breakdown: Quality Matters
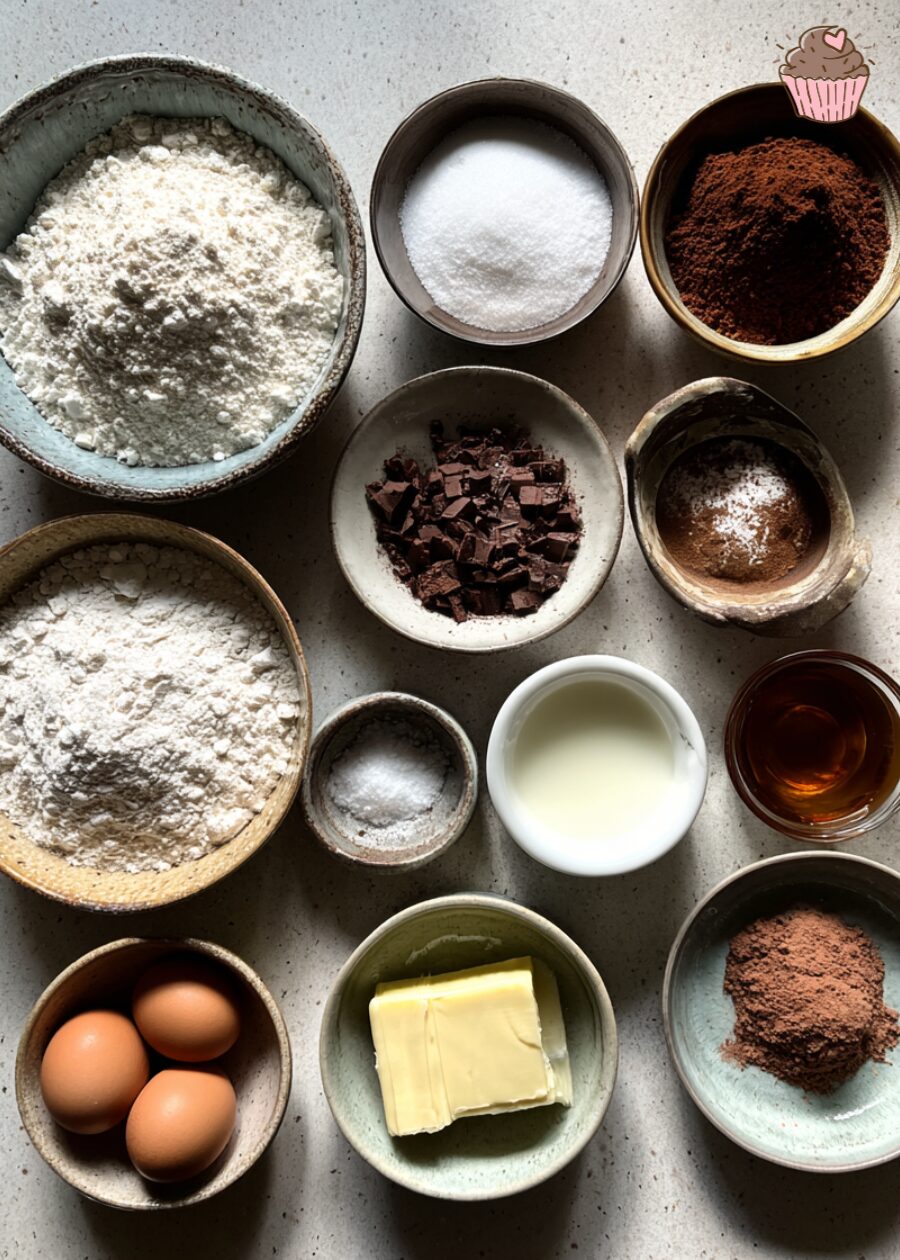
The secret to irresistible bakery-style cupcakes isn’t just technique—it starts with ingredients. Every element in this recipe is chosen for a reason, and when you understand why, your cupcakes get even better.
Cocoa Powder: For deep chocolate flavor, I prefer Dutch-processed cocoa. It’s smoother, less acidic, and gives a rich, dark color. Natural cocoa works too, but expect a lighter taste and appearance. My go-to is Valrhona or Ghirardelli Dutch-process—it never fails.
Buttermilk: This ingredient brings a subtle tang that balances the sweetness and boosts the cupcakes’ tenderness. It also reacts with baking soda for a light, airy crumb. No buttermilk? Stir 1 tablespoon of lemon juice or white vinegar into 1 cup of milk—let it sit for 5 minutes and you’re good to go.
Oil vs. Butter: While butter brings flavor, oil wins when it comes to moisture. It gives the cupcakes that melt-in-your-mouth texture and keeps them soft for days. I use neutral oils like canola or sunflower, but even light olive oil works if that’s what you have.
Hot Water or Coffee: Either helps “bloom” the cocoa, intensifying its flavor. Coffee deepens the chocolate taste without making it taste like mocha. If you’re not a fan of coffee, hot water still does the trick beautifully.
In short, don’t just bake—build flavor with each ingredient. That’s how you turn a good cupcake into an unforgettable one.
Step-by-Step Instructions (With Pro Tips)
Ready to bake? Let’s walk through this step-by-step—no stress, just delicious results. Follow along and pay attention to a few sensory cues that’ll help you bake like a pro.
Step 1: Preheat and Prep
Start by preheating your oven to 175°C (350°F). Line a 12-cup muffin tin with paper liners. This ensures even baking and easy cleanup.
Step 2: Mix the Wet Ingredients
In a large mixing bowl, whisk together the eggs, oil, buttermilk, and vanilla extract until smooth. You’re looking for a glossy, well-blended mixture.
Pro Tip: If your buttermilk and eggs are cold, the batter can seize or clump. Let them come to room temperature first.
Step 3: Combine Dry Ingredients
In a separate bowl, sift together your flour, cocoa powder, sugar, baking soda, and salt. This not only aerates the ingredients but helps avoid clumps of cocoa in the final batter.
Step 4: Bring It All Together
Gradually add the dry ingredients to the wet, whisking gently. Once mostly combined, pour in the hot water or coffee and whisk until smooth.
Sensory Cue: Your batter should be silky, glossy, and pourable—not too runny and definitely not thick like brownie batter.
Step 5: Fill the Liners
Use an ice cream scoop or a ¼ cup measure to fill each cupcake liner about two-thirds full. This gives them room to rise beautifully without overflowing.
Pro Tip: Don’t eyeball it—uneven cupcakes bake unevenly.
Step 6: Bake
Place the tray in the center of the oven and bake for 18–22 minutes. To test doneness, insert a toothpick into the center—it should come out with a few moist crumbs, not wet batter.
Step 7: Cool Down
Let the cupcakes cool in the pan for 5 minutes, then transfer them to a wire rack.
Pro Tip: Avoid cooling in the pan too long—it traps steam and can make the bottoms soggy.
And that’s it! Fluffy, chocolatey perfection awaits.
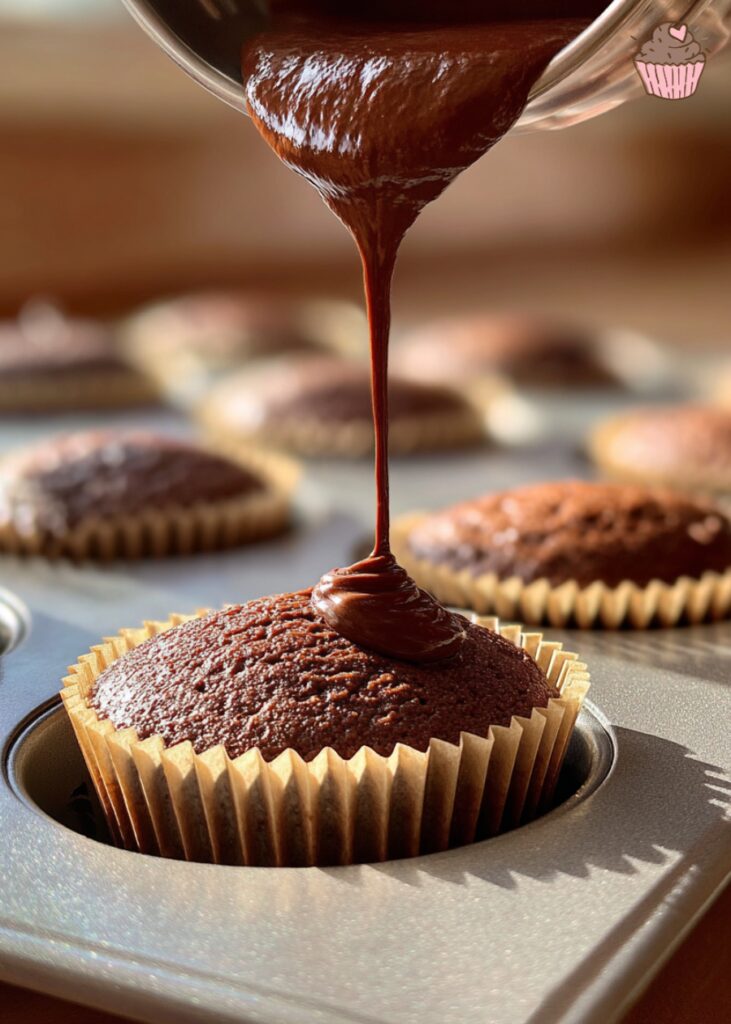
Choosing the Perfect Frosting (and My Favorite Pairing)
When it comes to frosting these rich, chocolatey cupcakes, my go-to pairing is a silky dark chocolate ganache. There’s something irresistible about the way the glossy ganache sinks slightly into the domed top, creating a fudgy, luxurious bite that complements the cupcake’s moist crumb. It’s not overly sweet, which makes it perfect for those who love a balanced chocolate experience rather than a sugar rush.
Of course, you can never go wrong with a classic vanilla buttercream either—the contrast of light, airy sweetness on a deep chocolate base is a timeless combination. Or if you love tangy notes, a smooth cream cheese frosting adds a wonderful bite that plays beautifully with the cocoa.
No matter which frosting you choose, make sure it’s spreadable yet sturdy enough to hold shape if you’re piping. For special occasions, I love to swirl mine with a large star tip and top with chocolate shavings or a sprinkle of flaky salt—it’s elegant, simple, and so satisfying.
Make-Ahead, Storage & Freezing Tips
These chocolate cupcakes are perfect for making ahead, and they stay fresh for up to 3 days at room temperature—just store them in an airtight container to lock in moisture. If you’ve already frosted them, keep them in a cool spot away from direct sunlight, but avoid the fridge unless absolutely necessary, as it tends to dry out the crumb.
Want to freeze them? Totally doable! Unfrosted cupcakes freeze best—once cooled, wrap each in plastic wrap, then place in a freezer-safe bag or container. They’ll stay fresh for up to 2 months. When you’re ready to enjoy, thaw them at room temperature for about an hour.
If you’ve already frosted the cupcakes, freeze them uncovered on a tray until firm, then wrap gently and store. Let them thaw in the fridge overnight and bring to room temperature before serving.
Avoid storing them unwrapped or loosely covered—exposure to air will dry them out quickly. A little prep goes a long way to ensure they taste bakery-fresh even days later!
Troubleshooting: Dry Tops? Soggy Bottoms? We’ve All Been There.
Let’s be real—we’ve all had a batch go sideways. Dry cupcakes, sunken middles, or sad, flat tops? Yep, been there, done that (more than once!).
Dry cupcakes are usually the result of overbaking or not enough fat. Always check for doneness a couple minutes before the timer goes off—your cupcakes should spring back when lightly pressed. Also, make sure you’re measuring flour correctly (spoon and level, never scoop!) and not skimping on oil or butter.
Sinking centers? That could mean your oven was too hot, causing the cupcakes to rise too fast and collapse. Or maybe your baking powder or soda is past its prime—these lose strength over time, so check those dates!
Flat tops often mean your oven isn’t hot enough, or you’ve filled the liners too little. For that beautiful domed top, try baking at 375°F (190°C) for the first 5 minutes, then lower to 350°F (175°C) to finish.
One of my worst batches? I once swapped baking soda for baking powder (whoops!) and ended up with a tray of dense, pancake-like cupcakes. But hey—every “fail” makes you a better baker. Cupcake disasters happen, but they’re always fixable (and still tasty with frosting!).
Print
Bakery-Style Chocolate Cupcakes
- Prep Time: 15 minutes
- Cook Time: 18-22 minutes
- Total Time: 35-40 minutes
- Yield: 12 cupcakes 1x
- Category: Dessert
- Method: Baking
- Cuisine: American
- Diet: Vegetarian
Description
These bakery-style chocolate cupcakes are incredibly moist, rich in chocolate flavor, and topped with a smooth frosting of your choice. Perfect for celebrations or everyday treats, they’re easy to make and deliver that professional bakery quality right at home.
Ingredients
- 1 cup (125g) all-purpose flour
- 1/2 cup (45g) unsweetened Dutch-processed cocoa powder
- 1 teaspoon baking soda
- 1/4 teaspoon salt
- 1/2 cup (100g) granulated sugar
- 1/2 cup (110g) packed light brown sugar
- 1 large egg, room temperature
- 1/2 cup (120ml) vegetable oil (canola or sunflower)
- 1/2 cup (120ml) buttermilk, room temperature
- 1 teaspoon vanilla extract
- 1/2 cup (120ml) hot brewed coffee or hot water
Instructions
- Preheat oven to 350°F (175°C) and line a 12-cup muffin pan with cupcake liners.
- In a medium bowl, sift together flour, cocoa powder, baking soda, and salt.
- In a large bowl, whisk together granulated sugar, brown sugar, egg, oil, buttermilk, and vanilla until smooth.
- Gradually add dry ingredients to wet ingredients, mixing gently until just combined.
- Slowly whisk in hot coffee or water until batter is smooth and pourable.
- Using a scoop or measuring cup, fill each cupcake liner about two-thirds full.
- Bake for 18–22 minutes, or until a toothpick inserted into the center comes out with a few moist crumbs.
- Let cupcakes cool in the pan for 5 minutes, then transfer to a wire rack to cool completely before frosting.
Notes
- Use Dutch-processed cocoa powder for a deeper, smoother chocolate flavor; natural cocoa powder can be substituted but will yield a lighter taste.
- Buttermilk adds tenderness and a slight tang; if unavailable, substitute with milk plus 1 tbsp lemon juice or vinegar.
- Vegetable oil keeps cupcakes moist and tender better than butter.
- Hot coffee or water intensifies chocolate flavor without adding coffee taste.
- Don’t overmix the batter to keep cupcakes light and fluffy.
- Recommended tools (affiliate links): silicone cupcake liners, good-quality mixing bowls, wire cooling rack, and cupcake scoop.
Nutrition
- Serving Size: 1 cupcake
- Calories: 270
- Sugar: 25g
- Sodium: 180mg
- Fat: 14g
- Saturated Fat: 2g
- Unsaturated Fat: 10g
- Trans Fat: 0g
- Carbohydrates: 32g
- Fiber: 3g
- Protein: 3g
- Cholesterol: 30mg
Keywords: chocolate cupcakes, bakery-style cupcakes, moist chocolate cupcakes, chocolate dessert, easy cupcake recipe
FAQ – Chocolate Cupcakes Edition
Absolutely! These cupcakes stay fresh for up to 3 days at room temperature in an airtight container. You can also freeze them (unfrosted is best) for up to 2 months.
Sunken centers often happen if your oven was too hot or you opened the door too early. It could also be old baking powder/soda—check those expiration dates!
This usually means they were overbaked. Try checking for doneness 2–3 minutes early next time. Also make sure you’re measuring flour correctly—don’t scoop directly from the bag.
Yes! Just store frosted cupcakes in a cool, dry place (not the fridge unless it’s very warm). The frosting helps seal in moisture.
You can! Just make sure not to overcrowd your oven and rotate the pans halfway through baking for even results.
Place them on a tray to flash freeze (about 1 hour), then wrap and store in an airtight container. Thaw overnight in the fridge, then bring to room temp before serving.
You can, but the texture will be slightly different—oil makes them more moist, while butter adds a richer flavor.
Not at all! A hand mixer or even a whisk will do the trick. Just be sure to mix until everything is smooth—don’t overmix!
Ready to Bake?
Now it’s your turn! Grab your cocoa, preheat the oven, and whip up these irresistibly moist chocolate cupcakes. Whether it’s for a birthday, celebration, or just a sweet craving—you can’t go wrong with this classic.
We’d love to hear how it turned out! Leave a comment below, rate the recipe, or tag us on Instagram @_chocokitchen so we can see your delicious creations!
Happy Baking!
Recipe by Nora, Choco Kitchen Blog


One Comment