
Classic Chocolate Pie: 7 Secrets to Ultimate Indulgence
Oh my goodness, let me tell you about my absolute favorite dessert: Classic Chocolate Pie! This pie is everything you could ever want in a chocolate treat—rich, velvety chocolate filling nestled in a perfectly flaky crust. Trust me, every bite is like a little slice of heaven! I remember the first time I made this pie for my family; the joy on their faces as they took that first bite was priceless. It’s become a staple at our gatherings, and I love how easy it is to whip up. Whether you’re celebrating a special occasion or just craving something sweet, this Classic Chocolate Pie is the answer. It’s decadent, yet simple enough to make any day feel like a celebration!
Ingredients List
- 1 pre-made pie crust
- 1 cup granulated sugar
- 1/3 cup unsweetened cocoa powder
- 1/4 cup cornstarch
- 1/4 teaspoon salt
- 2 3/4 cups milk
- 3/4 teaspoon vanilla extract
- 3 tablespoons unsalted butter
How to Prepare Classic Chocolate Pie Instructions
Preheat the Oven
First things first, let’s get that oven preheating to 350°F (175°C). This step is super important because it ensures that our pie bakes evenly. While that’s warming up, we can get everything else ready!
Prepare the Chocolate Filling
In a medium saucepan, combine the granulated sugar, unsweetened cocoa powder, cornstarch, and salt. Give it a good stir so everything is nicely mixed. Now, here comes the fun part: gradually add in the 2 3/4 cups of milk while whisking continuously. This is key to achieving that smooth, luscious chocolate filling we all crave, so don’t rush it—just keep whisking until it’s all combined and silky!
Cook the Mixture
Now, it’s time to cook! Place the saucepan over medium heat and keep stirring constantly. You’ll want to stay close because this will start to thicken up. Usually, it takes about 5 to 7 minutes. You’ll know it’s ready when it’s bubbling gently and has a nice pudding-like consistency. Ooh, the smell is heavenly!
Final Touches
Once thickened, remove the saucepan from the heat and stir in the vanilla extract and unsalted butter. Make sure you mix these in thoroughly; they add that extra layer of flavor that makes this pie unforgettable. Trust me, you don’t want to skip this step!
Assemble and Bake
Now, pour that dreamy chocolate filling straight into your pre-made pie crust. Spread it out gently so it’s even. Bake in the oven for about 10 minutes—this helps set the filling perfectly. Once it’s done, take it out and let it cool completely at room temperature. Patience is a virtue here, as letting it cool is crucial for the best texture!
Why You’ll Love This Recipe
- Quick and easy to prepare—perfect for any occasion!
- Decadently rich chocolate flavor that chocolate lovers will adore.
- Uses simple ingredients you probably already have in your pantry.
- Flaky crust adds the perfect contrast to the smooth filling.
- Can be served warm or chilled, making it versatile for any season.
- Impressive enough for gatherings, yet simple enough for a weeknight treat.
- Leftovers (if there are any!) are just as delicious the next day.
Tips for Success
Alright, let’s make sure your Classic Chocolate Pie turns out absolutely fabulous! Here are my top tips for achieving the best results:
- Chill for Perfection: Once your pie has cooled completely at room temperature, pop it in the fridge for at least 2 hours. This helps the filling set up beautifully and enhances the texture!
- Whisk Wisely: When mixing the milk into your dry ingredients, take your time. Whisk until the mixture is completely smooth to avoid any lumps in your filling.
- Flavor Boost: For an extra flavor kick, try adding a pinch of espresso powder along with the cocoa powder. It really intensifies that chocolatey goodness!
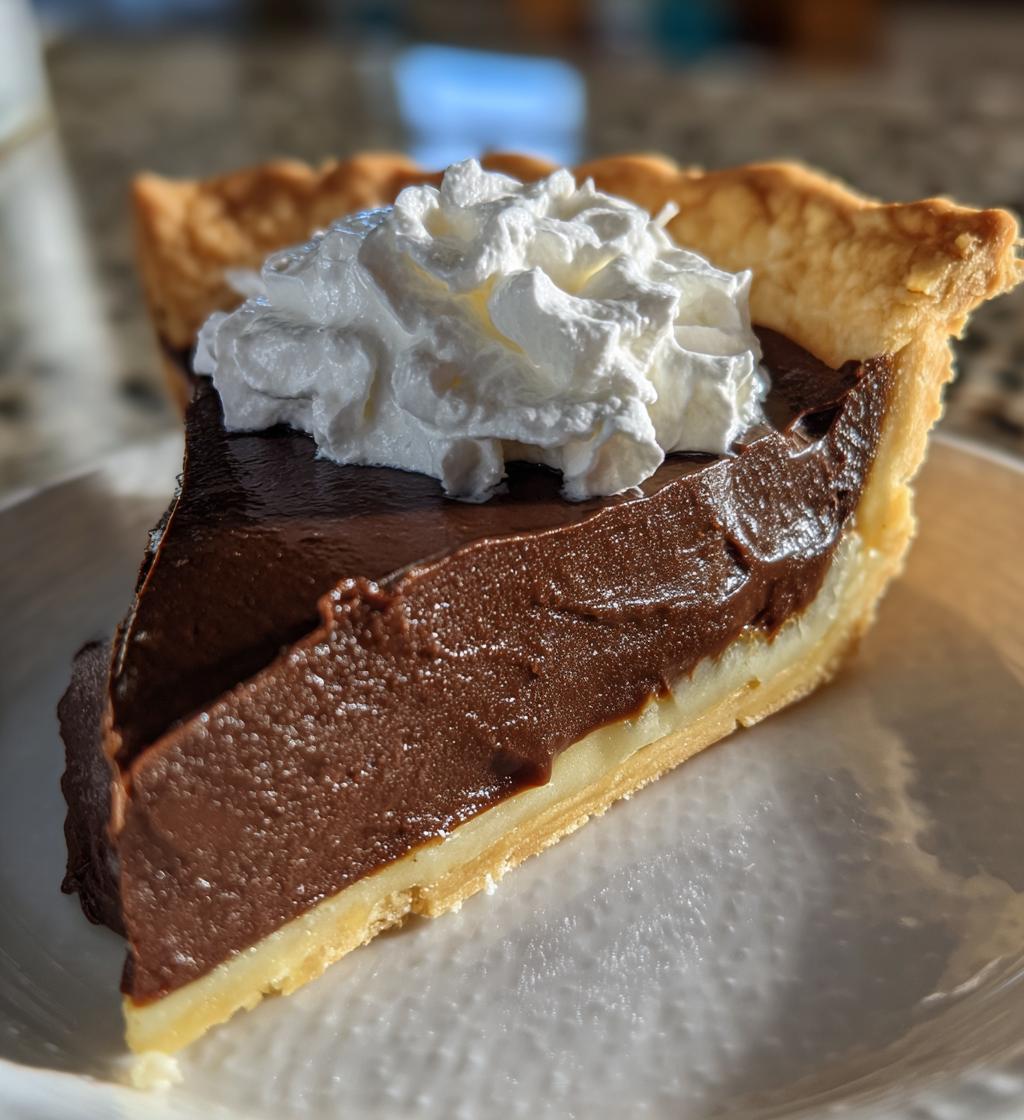
- Serving Suggestions: I love topping my pie with freshly whipped cream and chocolate shavings for a touch of elegance. You can also add fresh berries for a pop of color and flavor.
- Check for Doneness: Since we’re only baking for a short time, keep an eye on the pie. It should be set but still slightly jiggly in the center when you take it out—don’t worry, it will firm up as it cools!
- Leftover Love: If you have any leftovers (which is rare, trust me!), store them in an airtight container in the fridge. They’ll be just as delicious the next day!
Following these tips will help you create a Classic Chocolate Pie that’s not only delicious but also looks stunning on your table. You’ve got this!
Nutritional Information
Now, let’s chat about the nutritional info for this delectable Classic Chocolate Pie! Keep in mind that these values are estimates based on the ingredients used, but they give you a good idea of what to expect:
- Serving Size: 1 slice
- Calories: 250
- Fat: 10g
- Saturated Fat: 5g
- Unsaturated Fat: 3g
- Trans Fat: 0g
- Cholesterol: 15mg
- Sodium: 150mg
- Carbohydrates: 36g
- Fiber: 2g
- Sugar: 20g
- Protein: 4g
This pie is a delightful treat that balances indulgence with some nutritional information to keep in mind. Enjoy every bite without guilt, and remember that moderation is key! Happy baking!
Storage & Reheating Instructions
Alright, let’s talk about how to keep your Classic Chocolate Pie fresh and delicious after it’s made! First off, if you happen to have any leftovers (which is a big if, because it’s so good!), you’ll want to store it properly to retain that amazing flavor and texture. Just cover the pie with plastic wrap or aluminum foil, or pop it into an airtight container, and stash it in the refrigerator. It’ll stay fresh for about 3 to 4 days.
If you’re looking to enjoy your pie warm, you can reheat individual slices in the microwave. Just pop a slice on a microwave-safe plate and heat it for about 15-20 seconds—keep an eye on it so it doesn’t get too hot! You want it warm, not steaming. Alternatively, if you prefer to reheat the whole pie, you can place it in a preheated oven at 350°F (175°C) for about 10-15 minutes. This way, the crust will stay nice and flaky while the filling warms up beautifully.
And remember, if you want to enjoy that delightful texture, serving it chilled is just as fantastic! So whether you choose to savor it cold or warm, your Classic Chocolate Pie will always be a treat worth relishing. Happy indulging!
FAQ Section
Got questions about making the perfect Classic Chocolate Pie? Don’t worry, I’ve got you covered! Here are some of the most common queries I get, along with my tips:
Can I use a homemade pie crust instead of a pre-made one?
Absolutely! If you’re feeling adventurous, a homemade pie crust can elevate your Classic Chocolate Pie to the next level. Just make sure it’s fully cooled before adding the filling.
What can I substitute for cornstarch?
If you don’t have cornstarch on hand, you can use all-purpose flour as a thickening agent instead. Just remember to use about twice the amount, so around 1/2 cup should do the trick.
Can I make this pie ahead of time?
Yes, definitely! Classic Chocolate Pie actually tastes better after chilling in the fridge for a few hours, so feel free to prepare it a day in advance. Just remember to cover it well!
What are some variations I can try?
Oh, the possibilities are endless! You can add a hint of peppermint extract for a festive twist or mix in some peanut butter for a delicious chocolate-peanut butter combo. You could even fold in some chopped nuts or chocolate chips for added texture!
How should I serve this pie?
I love serving my Classic Chocolate Pie with a generous dollop of freshly whipped cream on top. For a touch of elegance, you could sprinkle some chocolate shavings or fresh berries. It’s all about that presentation and making it as delightful to the eyes as it is to the taste buds!
Can I freeze the pie?
While I recommend enjoying it fresh, you can freeze the pie. Just wrap it tightly in plastic wrap and then foil. It’s best to eat it within a month. Thaw it in the fridge overnight before serving!
What should I do if my filling is lumpy?
If you notice lumps in your filling, don’t panic! Just pour the mixture through a fine-mesh sieve before pouring it into the crust. This will give you that silky-smooth texture we all love!
With these tips and answers, you’re all set to make your Classic Chocolate Pie an absolute hit. Enjoy the baking adventure!
Print
Classic Chocolate Pie: 7 Secrets to Ultimate Indulgence
- Prep Time: 20 minutes
- Cook Time: 10 minutes
- Total Time: 30 minutes
- Yield: 8 servings 1x
- Category: Dessert
- Method: Baking
- Cuisine: American
- Diet: Vegetarian
Description
This Classic Chocolate Pie features a rich chocolate filling in a flaky crust.
Ingredients
- 1 pre-made pie crust
- 1 cup granulated sugar
- 1/3 cup unsweetened cocoa powder
- 1/4 cup cornstarch
- 1/4 teaspoon salt
- 2 3/4 cups milk
- 3/4 teaspoon vanilla extract
- 3 tablespoons unsalted butter
Instructions
- Preheat your oven to 350°F (175°C).
- In a saucepan, mix sugar, cocoa, cornstarch, and salt.
- Add milk gradually, whisking until smooth.
- Cook over medium heat, stirring constantly until the mixture thickens.
- Remove from heat and stir in vanilla and butter.
- Pour the filling into the pie crust.
- Bake for 10 minutes.
- Let it cool completely before serving.
Notes
- Chill the pie for better texture.
- Top with whipped cream if desired.
- Store leftovers in the refrigerator.
Nutrition
- Serving Size: 1 slice
- Calories: 250
- Sugar: 20g
- Sodium: 150mg
- Fat: 10g
- Saturated Fat: 5g
- Unsaturated Fat: 3g
- Trans Fat: 0g
- Carbohydrates: 36g
- Fiber: 2g
- Protein: 4g
- Cholesterol: 15mg
Keywords: Classic Chocolate Pie, Chocolate Dessert, Pie Recipes


