
Old-Fashioned Devil’s Food Cake
There’s something undeniably magical about an old-fashioned cake recipe—the kind passed down through generations, scribbled in faded ink on a weathered recipe card. And when it comes to chocolate cake, nothing stirs up memories quite like a slice of rich, moist Devil’s Food Cake. This isn’t just any cake. It’s the cake your grandmother used to make for birthdays and Sunday dinners. The one that made the entire house smell like a dream and left everyone fighting over the last slice.
I still remember the first time I made this recipe. It was a rainy Saturday afternoon, and I was craving something indulgent and nostalgic. I dug out an old cookbook, flour dust flying, and baked a cake that transported me straight back to my childhood kitchen. The moment I took that first bite—tender, deeply chocolatey, with that signature “devilishly” dark crumb—I knew this wasn’t your average dessert. It was comfort. It was history.

So, what makes this Devil’s Food Cake stand out? It’s that luscious cocoa flavor paired with an impossibly moist crumb, the result of just the right balance of sour cream, oil, and a touch of coffee to bring out the chocolate’s depth. Topped with a silky chocolate frosting that melts on your tongue, it’s the kind of cake that gets remembered—requested—devoured.
This recipe is here to become your new forever favorite. Whether you’re baking for a special occasion or just want to treat yourself to something deeply satisfying, this Old-Fashioned Devil’s Food Cake will win over hearts, one decadent slice at a time.
Ready to fall in love with chocolate all over again? Let’s bake something unforgettable.
History & Origins of Devil’s Food Cake
Every iconic dessert has a story—and Devil’s Food Cake has one as rich as its chocolatey crumb. While its name might sound mischievous (and maybe a little rebellious), this cake has a fascinating history rooted in American baking tradition, born from an era when cocoa was considered both exotic and luxurious.
A Bold Alternative to Angel Food Cake
Devil’s Food Cake is believed to have emerged in the early 1900s as the decadent counterpart to its light and fluffy sibling, Angel Food Cake. Where angel food was pale, airy, and delicate, devil’s food was the exact opposite—dark, dense, and full of flavor. It represented indulgence and temptation, with the name “devil” suggesting it was a little bit naughty, maybe even too delicious for its own good.
The Rise of Cocoa Powder
Around the same time, unsweetened cocoa powder became more widely available to American home bakers thanks to companies like Hershey’s. This revolutionized chocolate baking, and Devil’s Food Cake became one of the first recipes to fully embrace cocoa as a primary ingredient, using it generously to create an intensely chocolate-forward dessert.
From Cookbooks to Classic
One of the earliest printed mentions of Devil’s Food Cake appeared in cookbooks in the early 1900s, particularly in the South and Midwest, where it gained popularity quickly. Variations began popping up—some using hot water, others hot coffee, and many experimenting with the addition of sour cream or mayonnaise for extra moisture (yes, really!).
A Symbol of American Comfort Baking
Today, Devil’s Food Cake is a timeless classic—a staple at birthdays, family dinners, and celebrations of all kinds. It’s more than just cake; it’s nostalgia, comfort, and chocolate therapy in every bite. Its bold name and even bolder flavor have made it an enduring favorite that never goes out of style.
So while it may have a mischievous name, Devil’s Food Cake has earned its heavenly place in dessert history.
Ingredients for Old‑Fashioned Devil’s Food Cake
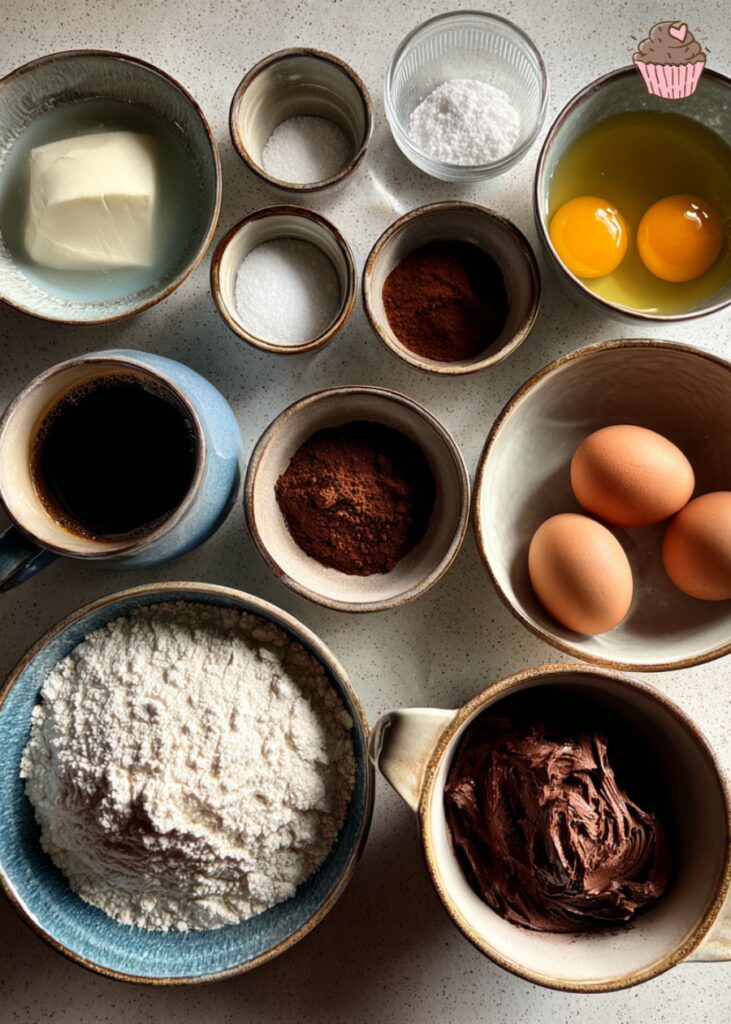
When it comes to baking a truly unforgettable Devil’s Food Cake, the magic lies in the ingredients. Each one plays a crucial role in creating that deep chocolate flavor, impossibly moist texture, and nostalgic richness that defines this classic dessert. Let’s break it down ingredient by ingredient—with notes to help you get it just right.
Dry Ingredients
- 1 ¾ cups (220g) all-purpose flour
The structure-builder of the cake. Be sure to spoon and level your flour—not scoop—to avoid a dense crumb. - ¾ cup (65g) unsweetened cocoa powder
Dutch-processed or natural both work, but Dutch-process gives a deeper, smoother flavor. Use the best quality you can find for that true chocolate punch. - 1 ½ teaspoons baking soda
The main leavening agent. It reacts with the acidic elements (like buttermilk or coffee) to give your cake its soft, tender lift. - ½ teaspoon baking powder
Just a little helps round out the rise, especially if you’re using natural cocoa powder. - ½ teaspoon salt
Balances the sweetness and makes the chocolate flavor pop.
Wet Ingredients
- ½ cup (115g) unsalted butter, softened
Adds rich flavor and contributes to a tender crumb. Cream it well for a lighter texture. - ½ cup (120ml) vegetable oil
Keeps the cake moist for days. This combo of butter + oil is a secret weapon for perfect texture. - 1 ½ cups (300g) granulated sugar
Sweetens, yes—but also helps create a soft, moist crumb. - ½ cup (100g) packed brown sugar
Adds depth and a slight chew thanks to the molasses content. - 2 large eggs, room temperature
These bind the batter and provide structure. Room temp eggs mix better and help the cake rise evenly. - 1 teaspoon vanilla extract
Rounds out the chocolate flavor and adds warmth. - 1 cup (240ml) buttermilk, room temperature
Its acidity keeps the crumb tender and reacts with the baking soda. No buttermilk? Add 1 tbsp vinegar or lemon juice to a cup of milk and let sit for 10 minutes. - ¾ cup (180ml) hot coffee or boiling water
Intensifies the chocolate flavor and helps “bloom” the cocoa powder. Don’t worry—it won’t taste like coffee.
Step-by-Step Instructions
Baking this cake is straightforward, and once you do it once, you’ll want to make it again and again. The key is to take your time, enjoy the process, and follow each step with love (and maybe a little music in the background). Here’s how to bring your Devil’s Food Cake to life:
Step 1: Prep pans & oven
Preheat your oven to 350°F (175°C). Lightly grease two 8-inch round cake pans, then line the bottoms with parchment paper for easy release. Dust with cocoa powder instead of flour to avoid a white residue on your rich chocolate layers. This step ensures clean, smooth edges and no sticking—so important!
Step 2: Sift dry ingredients
In a large bowl, sift together the flour, cocoa powder, baking soda, baking powder, and salt. Sifting not only removes lumps but also helps aerate the mixture, leading to a lighter, fluffier cake.
Step 3: Cream butter + sugars
In a separate large bowl, cream the softened butter, granulated sugar, and brown sugar together using a stand or hand mixer. Beat on medium speed for about 2–3 minutes, until the mixture is light and fluffy. This step incorporates air, setting the foundation for a soft crumb.
Step 4: Add eggs, sour cream, oil, vanilla
Beat in the eggs, one at a time, until fully incorporated. Add the sour cream, vegetable oil, and vanilla extract, mixing until smooth and glossy. This mixture should look rich and slightly thick—don’t overmix, just blend until uniform.
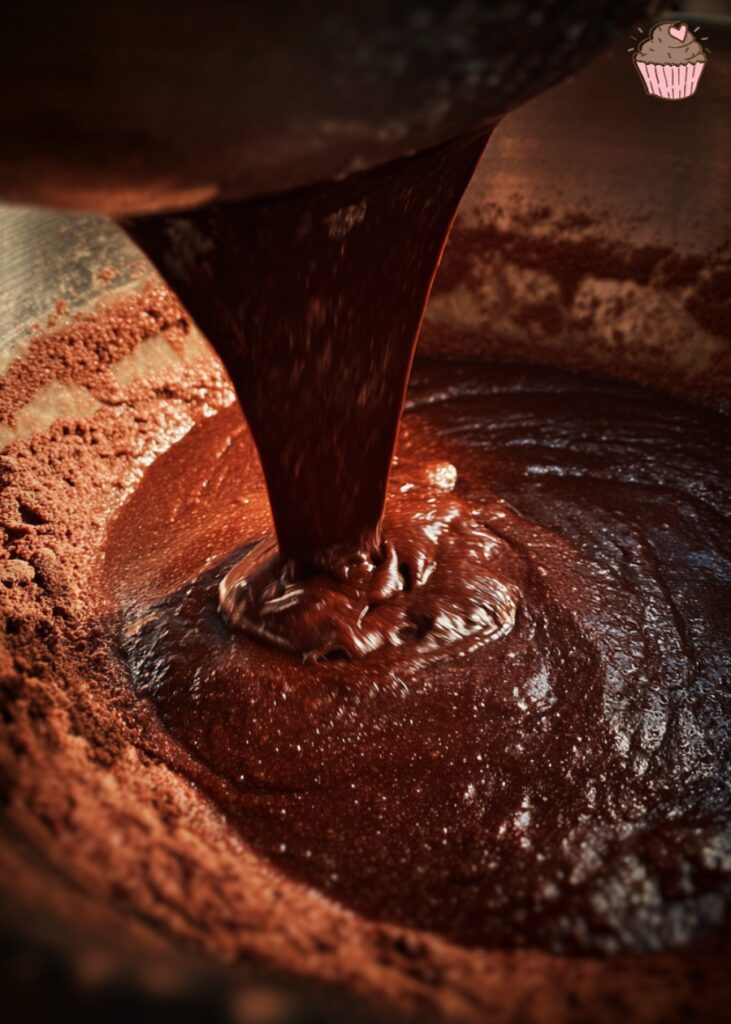
Step 5: Stir in hot coffee
With the mixer on low (or using a whisk), slowly stream in the hot coffee. The batter will look thin—that’s exactly what you want. The coffee “blooms” the cocoa, intensifying the chocolate flavor and helping to keep the crumb extra moist.
Step 6: Bake
Divide the batter evenly between your prepared pans. Tap each one gently on the counter to remove air bubbles. Bake for 30–35 minutes, or until a toothpick inserted in the center comes out with a few moist crumbs (not wet batter). Don’t overbake—it’s the enemy of moisture!
Let the cakes cool in the pans for 10 minutes, then turn them out onto a wire rack to cool completely. Once cooled, they’re ready to be frosted, layered, or even enjoyed plain (yes, it’s that good on its own!).
Assembly & Frosting
Slice and Layer
Once your cake layers are completely cool, it’s time to assemble—and this is where the magic really happens.
Trim the tops (if needed):
If your cakes have domed slightly during baking, use a cake leveler or serrated knife to gently slice off the peaks. This step ensures even layers that won’t wobble or slide when stacked. Don’t toss the scraps—snack on them while you frost (baker’s privilege!).
Stack the first layer:
Place one cake round on your serving plate or cake stand. Spread a generous layer of chocolate frosting over the top, using an offset spatula to smooth it evenly all the way to the edges. Don’t worry if it’s not perfect—rustic charm has its own beauty.
Add the second layer:
Carefully position the second cake layer on top, pressing down ever so slightly to secure. Then, apply a crumb coat—a thin layer of frosting that seals in any loose crumbs. Chill the cake for 15–20 minutes to set this coat.
Final frosting layer:
Once chilled, slather on the remaining frosting, swirling it luxuriously over the top and sides. You can go rustic and swoopy or smooth and polished—this cake looks stunning either way.
Finish with chocolate shavings, a dusting of cocoa powder, or keep it clean and classic. However you decorate it, once you slice into this rich, moist masterpiece, all eyes will be on the cake—and the smiles will follow.
Cake Science: What Makes It So Moist and Dark
Devil’s Food Cake isn’t just a catchy name—it’s a masterclass in baking chemistry. The reason it’s so deeply chocolatey, moist, and tender comes down to the perfect marriage of ingredients and technique. Let’s break down the science behind that irresistible crumb and luscious darkness.
- Dutch-Processed Cocoa:
This type of cocoa powder is treated with an alkalizing agent to neutralize its acidity, resulting in a darker color and smoother, richer flavor. It gives the cake that almost black chocolate hue and deep, luxurious taste. Think bold, almost fudge-like depth without the bitterness. - Sour Cream or Buttermilk:
The acidity in these ingredients not only reacts with baking soda to help the cake rise evenly, but also tenderizes the crumb. It breaks down gluten just enough to make the texture soft and delicate—without being crumbly or dry. - Hot Coffee or Boiling Water:
Adding hot liquid “blooms” the cocoa, which means it dissolves and releases its full flavor. Coffee, in particular, intensifies the chocolate notes without adding a coffee taste. It also thins out the batter, which may look strange but is key to that melt-in-your-mouth moisture. - Brown Sugar:
The molasses content in brown sugar holds onto moisture far better than white sugar. This keeps the cake fresher for longer and adds subtle caramel undertones that complement the cocoa beautifully. - Oil + Butter Combo:
Butter brings richness and flavor, while oil contributes unbeatable moisture. Oil remains liquid even when cold, which is why this cake stays soft—even straight from the fridge.
Together, these elements create a cake that’s not just moist for the first day—but stays that way for days after. The texture is plush, the flavor deep and satisfying, and every bite is proof that science and indulgence are a delicious duo.
Common Mistakes & Troubleshooting
Even seasoned bakers run into hiccups—especially with a rich, moist cake like Devil’s Food. Here are the most common pitfalls (and how to avoid them):
- Tunneling (those odd holes in your cake)
This usually means overmixing. When you stir too much after adding flour, gluten develops excessively, creating air pockets. To fix it: mix just until combined—no more! - Dry or Crumbly Texture
Devil’s Food Cake should be plush, not dry. Dryness can result from baking too long, measuring flour incorrectly, or skipping the oil. Always spoon flour into your cup (don’t scoop!), use a timer, and don’t reduce the fat. - Sunken Middle
This typically comes from underbaking or opening the oven too early. Trust your timer and wait until the center springs back before opening the oven door. - Cracked Top
A slightly cracked top is normal, but deep cracks suggest a too-hot oven. Use an oven thermometer to ensure accuracy—most home ovens run hotter than you think!
Tip: Room temperature ingredients mix more evenly and reduce baking surprises.

Old-Fashioned Devil’s Food Cake
- Prep Time: 20 minutes
- Cook Time: 35 minutes
- Total Time: 55 minutes
- Yield: 12 servings 1x
- Category: Dessert
- Method: Baking
- Cuisine: American
- Diet: Vegetarian
Description
An indulgent, deeply chocolaty Old-Fashioned Devil’s Food Cake with a moist, tender crumb and rich cocoa flavor. This nostalgic dessert is layered with silky chocolate frosting and perfect for birthdays, holidays, or whenever a serious chocolate craving strikes.
Ingredients
- 2 cups (240g) all-purpose flour
- 3/4 cup (65g) unsweetened cocoa powder
- 2 teaspoons baking powder
- 1 teaspoon baking soda
- 1/2 teaspoon salt
- 1 cup (226g) unsalted butter, softened
- 1 1/4 cups (250g) granulated sugar
- 1/2 cup (100g) packed light brown sugar
- 3 large eggs
- 1/2 cup (120ml) sour cream
- 1/4 cup (60ml) vegetable oil
- 2 teaspoons vanilla extract
- 1 cup (240ml) hot brewed coffee
Instructions
- Preheat your oven to 350°F (175°C). Grease and flour two 9-inch round cake pans or line with parchment paper.
- In a large bowl, sift together flour, cocoa powder, baking powder, baking soda, and salt.
- In another bowl, cream together the butter, granulated sugar, and brown sugar until light and fluffy.
- Beat in the eggs one at a time. Then mix in the sour cream, vegetable oil, and vanilla extract until smooth.
- Gradually add the dry ingredients to the wet ingredients and mix until just combined.
- Slowly stir in the hot brewed coffee. The batter will be thin — that’s expected.
- Divide the batter evenly between the prepared pans. Bake for 30–35 minutes, or until a toothpick inserted in the center comes out clean.
- Let the cakes cool in the pans for 10 minutes, then transfer to wire racks to cool completely before frosting.
Notes
- Use room temperature eggs and softened butter for a smooth, well-mixed batter.
- Don’t overmix after combining wet and dry ingredients — it keeps the cake tender.
- Hot coffee enhances the cocoa flavor without making the cake taste like coffee.
- If you don’t have sour cream, you can substitute with plain Greek yogurt.
- Cool the cake layers fully before adding frosting to avoid melting.
- Special Tools (affiliate links):
- 9-Inch Nonstick Cake Pans (Set of 2) – Ensures even layers
- Offset Spatula – For smooth, professional frosting
- Cooling Rack – Promotes even cooling
- Hand Mixer – Speeds up creaming and mixing
- Cake Leveler – For flat, even cake layers
- Measuring Cups and Spoons – For precise baking
- Mixing Bowls – Set of 3 – Great for prepping ingredients
Nutrition
- Serving Size: 1 slice (1/12th of cake)
- Calories: 420 kcal
- Sugar: 38 g
- Sodium: 230 mg
- Fat: 22 g
- Saturated Fat: 13 g
- Unsaturated Fat: 7 g
- Trans Fat: 0.5 g
- Carbohydrates: 53 g
- Fiber: 3 g
- Protein: 5 g
- Cholesterol: 85 g
Keywords: Devil’s Food Cake, moist chocolate cake, old-fashioned chocolate cake, classic dessert, homemade cake
Frequently Asked Questions
Yes! You can bake the layers a day in advance. Once cooled, wrap each one tightly in plastic wrap and keep at room temperature or refrigerate. Assemble and frost the next day for the freshest taste and texture.
Devil’s Food Cake is darker, richer, and has a lighter, fluffier texture. It often uses cocoa powder instead of melted chocolate and includes acidic ingredients like sour cream or buttermilk for extra moisture and depth of flavor.
You can—but know that it will slightly alter the flavor and leavening. Dutch cocoa has a smoother, more mellow taste. If you substitute, make sure your baking powder can handle the difference in acidity.
Absolutely. This batter makes around 24 standard cupcakes. Fill liners about 2/3 full and bake at 350°F (175°C) for 18–22 minutes, or until a toothpick comes out clean.
Yes! Wrap unfrosted layers tightly in plastic wrap and foil, then freeze for up to 3 months. To thaw, move to the fridge overnight, then bring to room temp before assembling.
Classic chocolate buttercream or ganache pairs perfectly, but cream cheese frosting adds a lovely tang that complements the richness beautifully.
Storage & Freezing
Devil’s Food Cake is surprisingly sturdy when it comes to storage, which means you can absolutely enjoy leftovers (if there are any!) without sacrificing flavor or texture.
- Room Temperature: If your kitchen is cool and the cake is frosted with a butter-based or shelf-stable frosting, you can store it at room temperature in an airtight container or covered cake stand for up to 2 days.
- Refrigerator: For longer freshness, especially if your frosting contains dairy, store the cake covered in the fridge for up to 5 days. Bring it to room temperature before serving so the crumb and frosting soften perfectly.
- Freezer: You can freeze individual cake layers (unfrosted) by wrapping them tightly in plastic wrap and foil. They’ll keep well for up to 3 months. To thaw, place them in the fridge overnight and bring to room temp before assembling.
- Freezing a Frosted Cake: Yes, it’s doable! Freeze uncovered for 1–2 hours until the frosting firms up, then wrap the whole cake gently in plastic wrap and foil. Thaw overnight in the fridge and let it sit out before serving.
Whether you’re prepping ahead or savoring leftovers, this cake stays moist and rich with proper storage—just like the day it came out of the oven.
Variations & Serving Suggestions
Devil’s Food Cake is already a chocolate lover’s dream—but there are so many ways to make it your own or elevate it for special occasions.
- Filling it up: Swap out the classic buttercream for chocolate ganache, raspberry jam, or even whipped cream between the layers. These fillings add exciting contrast in flavor and texture.
- Add a crunch: Fold in chopped dark chocolate, toffee bits, or toasted nuts to the batter for texture that surprises in every bite.
- Spice it up: For a cozy twist, add a pinch of cinnamon, espresso powder, or even a dash of chili powder to the dry mix. They bring warmth and depth to the chocolate without overpowering it.
- Mini cakes or cupcakes: The batter works beautifully in cupcake tins or mini bundt pans—perfect for parties, bake sales, or gifting.
- Serving ideas: A slice of this cake is heavenly with a scoop of vanilla ice cream, a drizzle of warm fudge sauce, or a dollop of freshly whipped cream. For something refreshing, try it with berries on the side.
This cake is endlessly adaptable—whether you’re dressing it up or keeping it classic, it never fails to impress.
Conclusion
There you have it—your new go-to recipe for an irresistibly moist, rich, and truly old-fashioned Devil’s Food Cake. Whether you’re baking for a special occasion or simply craving a chocolate fix, this cake promises to deliver comfort and decadence in every bite. I can’t wait for you to try it and experience the deep, luscious flavors and tender crumb that make this recipe stand out.
If you give it a go, please come back and share your thoughts! I’d love to hear how it turned out, any tweaks you made, or your favorite ways to enjoy it. Don’t forget to leave a comment, rate the recipe, and share your beautiful creations on Instagram or Pinterest. Your feedback and photos inspire me and help build this wonderful baking community.
Happy baking, and here’s to many delicious slices ahead!
Recipe by Nora, Choco Kitchen Blog


