
Levain Bakery-Style Cookies
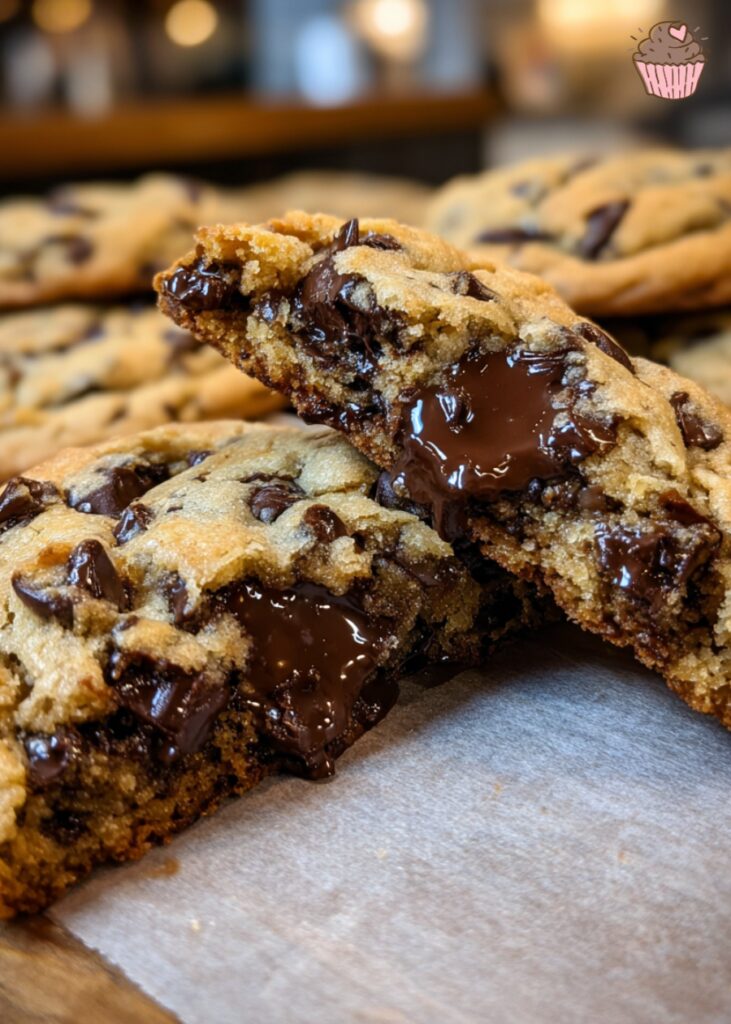
You know those moments when a bite of something sweet makes the world go quiet for a second? That’s exactly what happened the first time I made these thick, bakery-style chocolate chip cookies. I pulled one from the tray, still warm, broke it in half, and watched the melted chocolate ooze out like a slow-motion dream. The outside had a perfect golden crunch, but the inside? Soft, gooey, and borderline molten. I literally paused mid-bite—it was that good.
These cookies aren’t your average after-school snack. They’re thick enough to hold in two hands, rich enough to share (but you won’t want to), and they taste like something you’d line up for in a little NYC bakery on a rainy afternoon. Over the years, I’ve tested dozens of cookie recipes, but this one? It hits different. It’s indulgent, comforting, and just the right amount of over-the-top. If you’ve never had a Levain-style cookie before, get ready—this one’s about to ruin all other cookies for you.
Ingredients Matter: Don’t Skip These Essentials
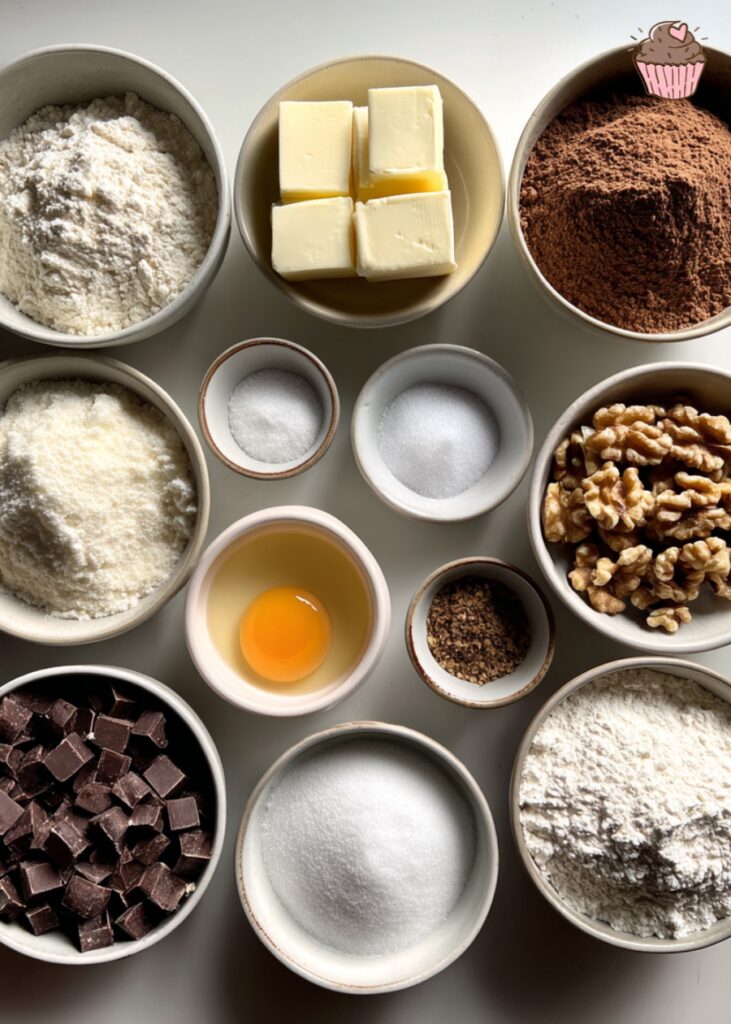
When it comes to cookies this thick and gooey, every ingredient pulls its weight. I’ve played around with lots of variations over the years, but these are the ingredients I come back to every single time. Trust me, each one is there for a reason.
Cold Butter (Yes, Cold!)
Unlike most cookie recipes that call for softened or melted butter, this one starts with cold butter straight from the fridge. Why? It slows down the spread in the oven, keeping the dough thick and helping those glorious, bakery-style mounds hold their shape. It also creates a rich, dense crumb that’s soft in the center and crispy on the edges. Cutting it into cubes makes it easier to mix.
Cornstarch: The Texture Secret
A little cornstarch might not seem like a game-changer—but oh, it is. It softens the flour’s strength just enough to give these cookies that tender, melt-in-your-mouth interior. I like to think of it as the ingredient that whispers “bakery-soft” into every bite.
Cake Flour + All-Purpose Flour Combo
I know it’s tempting to swap with what’s on hand—but trust me, use the cake flour. The blend of cake and all-purpose flour balances tenderness with structure. All cake flour? Too soft. All AP? Too tough. This combo? Just right.
Dark Chocolate Chunks > Chocolate Chips
I’m team chunks, all the way. Unlike chips, which hold their shape, chunks melt into gooey pockets of chocolatey bliss. Go for at least 60% cacao if you like a richer, more grown-up flavor. If you really want to level up, chop a good-quality dark chocolate bar—it gives you a mix of melty puddles and crispy shards. Heaven.
These aren’t ingredients you just toss together. Each one plays a role in making the ultimate thick cookie experience—and once you taste the results, you’ll never go back.
Step-by-Step: The Method Behind the Madness
Let’s get one thing straight—these aren’t your quick, 10-minute, “I’ve got leftover chips in the cupboard” kind of cookies. This is a project cookie. But one that’s totally worth it. Every step builds toward that thick, gooey center and golden, craggy top. And with the right method, you’ll absolutely nail it.
Step 1: Cube the Cold Butter
Start by cutting your cold butter into small cubes—no softening, no melting. This makes it easier to beat and helps control the spread. I know it feels weird not to let it soften, but cold butter is the secret to those tall, bakery-style cookies.
Step 2: Cream with Brown and White Sugar
Use a stand mixer or handheld beater to cream the butter with both sugars. Don’t rush this—let it go for 3–4 minutes on medium-high until it’s light, fluffy, and sticks to the sides of the bowl. You’ll notice the mix gets pale and smooth. That’s your sign to move on.
Step 3: Add the Eggs and Vanilla
Crack in your eggs one at a time, mixing well after each addition. Then stir in the vanilla extract. The dough will get silkier here—almost like a thick cake batter. If it looks a little wet, that’s totally normal.
Step 4: Combine the Dry Ingredients Separately
Whisk together your all-purpose flour, cake flour, cornstarch, baking soda, and salt in a separate bowl. This keeps everything evenly distributed so you don’t end up with a weird salty bite or a puffed-up flour pocket.
Step 5: Add Dry to Wet—Gently!
Pour the dry mix into the wet and mix on low just until combined. Don’t overmix here or you’ll lose that tender center. You want the dough to come together into a chunky, sticky mass. It should look a bit like brownie batter loaded with mix-ins.
Step 6: Fold in the Chocolate Chunks
Use a spatula (or your hands) to fold in the chocolate chunks. Don’t skimp. You want pockets of chocolate in every single bite. At this point, the dough should be thick enough to scoop but still soft.
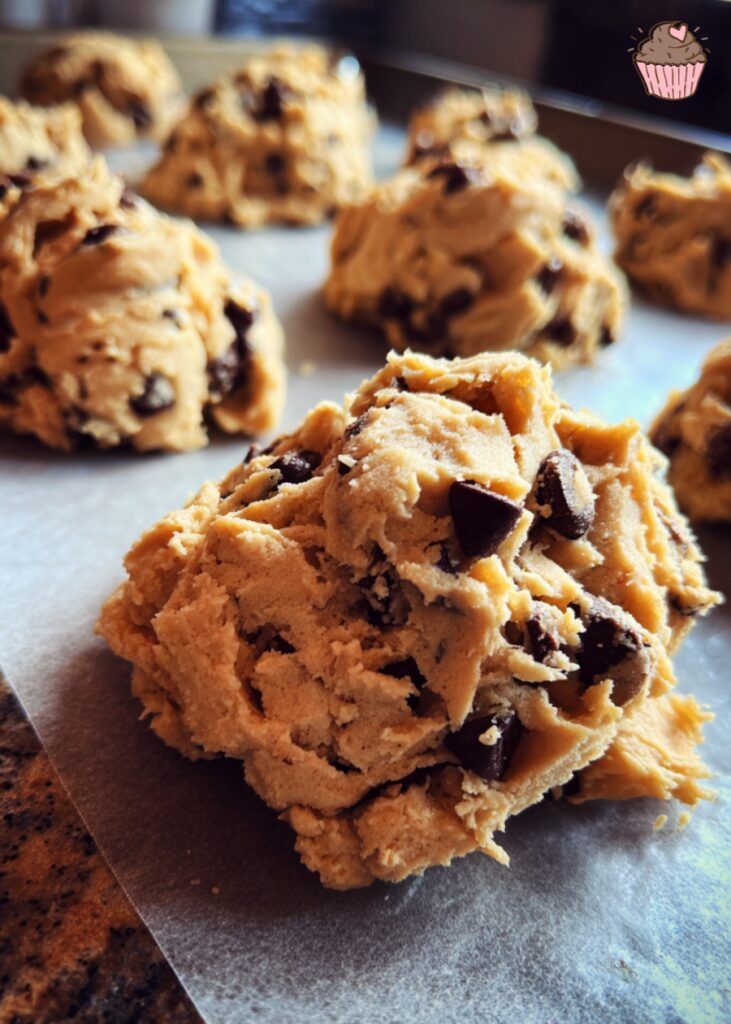
Step 7: Chill the Dough (Non-Negotiable)
Here’s where the magic happens. Chill your dough for at least 12 hours, or overnight. I know the wait is torture, but this step controls spread, deepens flavor, and gives you those glorious thick centers. Pro tip: scoop the dough into large, tall mounds before chilling—think ice cream scoop meets golf ball.
Step 8: Bake Until Golden, But Not Dry
Bake at 190°C (375°F) for 12–14 minutes. You’ll notice the edges will be golden brown, but the centers will look just slightly underdone. That’s perfect. Let them sit on the baking tray for 10 minutes to firm up. They finish cooking as they rest.
Final Tip: Don’t Overthink It
The first time I made these, I baked one tray without chilling. Big mistake—flat, sad pancakes. Once you follow the steps and trust the chill time, you’ll get thick, bakery-style cookies every time.
Tips for Extra-Thick, Gooey Results
Want that sky-high cookie with the molten center and crispy edges? Here’s the extra magic—the behind-the-scenes stuff that takes your cookies from good to jaw-droppingly good. Trust me, these little details matter more than you’d think.
1. Chill the Dough—Seriously
I know it sounds dramatic, but chilling the dough overnight really is a game-changer. Not only does it deepen the flavor (like, caramel-butterscotch levels of good), it keeps the cookies from spreading into sad little puddles in the oven. Give it at least 12 hours—24 if you’ve got the patience. You won’t regret it.
2. Shape It Tall, Not Flat
This one’s huge: don’t flatten your dough balls before baking. In fact, go the opposite direction. Shape them tall—like mini scoops of ice cream or rough, chunky towers. This gives the centers time to bake slowly, staying gooey and soft while the edges crisp up beautifully.
3. Freeze the Dough Before Baking
Here’s a sneaky trick: after shaping your dough balls, pop them in the freezer for 30 minutes before baking. This helps them stay thick, bake more evenly, and gives you a slightly crispier edge without drying out the inside. Win-win.
4. Oven Tips
Every oven is a little different. I like to bake one test cookie first to see how it spreads and adjust the temperature by 5–10 degrees if needed. And always, always use a light-colored baking tray with parchment paper—it helps prevent over-browning on the bottom.
These tips come from lots of trial, error, and slightly-too-flat cookies. Stick with them, and you’ll be biting into bakery-thick perfection in no time.
Troubleshooting: Common Cookie Woes (and How to Fix Them)
So… your cookies didn’t turn out exactly like the ones in the photos? Been there. Let’s fix it.
Flat Cookies?
Chances are your butter was too soft, or you skipped the chilling step (no shame—we’ve all done it!). Cold butter and chilled dough are non-negotiables for height. Also, make sure you’re shaping the dough into tall mounds, not flattened balls.
Dry or Crumbly?
If your cookies came out more like scones, it could be from overbaking or using too much flour. Next time, spoon and level your flour (don’t scoop!), and pull the cookies from the oven when the edges are golden but the centers still look slightly underbaked—they’ll set up as they cool.
Underdone in the Center?
If they’re too gooey (like raw), your cookies may be too big or your oven temp may run low. Try making slightly smaller dough balls, or bake a couple minutes longer while watching closely. Also, make sure your oven is fully preheated before the cookies go in.
Spreading Too Much?
Use parchment paper—not a greased baking sheet—and make sure your dough is chilled. Baking one test cookie first can help you catch spread issues before the whole batch goes in.
No cookie disaster is the end of the world. A few tweaks, a little patience, and you’ll be baking like a pro in no time.
Personal Note: Why I’ll Never Stop Making These Cookies
There’s something about these cookies that just sticks. They’re not just dessert—they’re comfort, celebration, therapy, and nostalgia all baked into one oversized bite. I’ve made them for birthdays, late-night cravings, breakups, snow days, and quiet Sundays that needed a little something extra.
They’ve become my go-to recipe—the one friends ask for, the one I wrap in parchment and gift in little boxes, and the one I always have dough balls of tucked away in my freezer… just in case. Because let’s be honest—life is unpredictable, but a warm, gooey cookie can fix a lot of things.
I didn’t grow up baking cookies like this. It took years of trial, error, and more than a few flat cookie flops to land on this version. But now? It feels like mine. Familiar, foolproof, and always worth the effort.
And if you give them a try, I hope they become your cookie too. The one you turn to when you want something cozy, rich, and a little bit magical.
Print
Levain Bakery-Style Cookies
- Prep Time: 15 minutes (plus 12+ hours chilling)
- Cook Time: 12-14 minutes
- Total Time: 12 hours 30 minutes to overnight (mostly chilling time)
- Yield: 12 large cookies 1x
- Category: Dessert, Snack
- Method: Baking
- Cuisine: American
- Diet: Vegetarian
Description
These thick, bakery-style chocolate chip cookies feature a crisp golden edge with a gooey, molten center, perfect for anyone craving a rich and indulgent treat that’s surprisingly easy to make at home.
Ingredients
- 1 cup (227g) cold unsalted butter, cubed
- 1 cup (200g) light brown sugar, packed
- ½ cup (100g) granulated sugar
- 2 large eggs
- 2 teaspoons vanilla extract
- 1¼ cups (150g) all-purpose flour
- 1 cup (120g) cake flour
- 2 teaspoons cornstarch
- 1 teaspoon baking soda
- ½ teaspoon salt
- 12 oz (340g) dark chocolate chunks (60% cacao or higher)
Instructions
- Cut cold butter into small cubes and set aside.
- Cream butter with brown and granulated sugars in a mixer on medium-high speed until light and fluffy, about 3-4 minutes.
- Add eggs one at a time, mixing well after each, then stir in vanilla extract.
- In a separate bowl, whisk together all-purpose flour, cake flour, cornstarch, baking soda, and salt.
- Slowly add dry ingredients to wet mixture, mixing on low just until combined; avoid overmixing.
- Fold in dark chocolate chunks evenly using a spatula.
- Scoop dough into tall, rough mounds (about ¼ cup per mound) and chill in the refrigerator for at least 12 hours, preferably overnight.
- Preheat oven to 375°F (190°C). If frozen, bake dough balls directly from fridge or freezer, adding 2-3 minutes if frozen.
- Place dough mounds on parchment-lined baking sheets, spaced apart, and bake for 12-14 minutes until edges are golden and centers still look slightly underbaked.
- Allow cookies to rest on the baking sheet for 10 minutes before transferring to a cooling rack.
Notes
- Chilling dough overnight is essential for thick, gooey cookies with optimal flavor.
- Use a mix of all-purpose and cake flour for the best texture; cake flour softens the crumb.
- Cold butter prevents excess spreading and creates a tender crumb.
- Dark chocolate chunks melt better than chips, creating gooey pockets.
- Recommended baking tools (affiliate links): silicone baking mats, cookie scoop, cooling rack, and quality mixing bowls.
Nutrition
- Serving Size: 1 cookie (about 100g)
- Calories: 350 kcal
- Sugar: 25 g
- Sodium: 150 mg
- Fat: 20 g
- Saturated Fat: 12 g
- Unsaturated Fat: 6 g
- Trans Fat: 0 g
- Carbohydrates: 40 g
- Fiber: 3 g
- Protein: 5 g
- Cholesterol: 60 mg
Keywords: thick chocolate chip cookies, bakery-style cookies, gooey chocolate cookies, Levain copycat cookies, chewy cookies recipe
FAQs About Levain Bakery Cookies
Yes, and honestly—you should! After shaping the dough into tall balls, pop them in the freezer on a baking tray until firm, then transfer to a zip-top bag. They’ll keep for up to 3 months. Bake straight from frozen—just add 2–3 extra minutes to the baking time.
For that fresh-from-the-oven magic, reheat a baked cookie in the microwave for 10–15 seconds or in a 160°C (325°F) oven for 5 minutes. The chocolate gets melty again, and the center turns perfectly gooey.
You can, but the texture won’t be quite the same. Cake flour adds softness and helps balance the heft of the cookie. If you’re in a pinch, sub 1 cup of cake flour with ¾ cup all-purpose + 2 tablespoons cornstarch.
Yes. I know—it’s hard to wait. But chilling helps control spread, intensifies the flavor, and gives you that thick, chewy bite. Even 12 hours makes a difference. 24 is better. Trust the chill.
Your butter may have been too warm, or your dough wasn’t chilled long enough. Also, don’t skip the tall shaping trick—it’s key for that bakery look.
Still have questions? Drop them in the comments or shoot me a message—I’m always happy to help troubleshoot your cookies!
Recipe by Nora, Choco Kitchen Blog


One Comment