
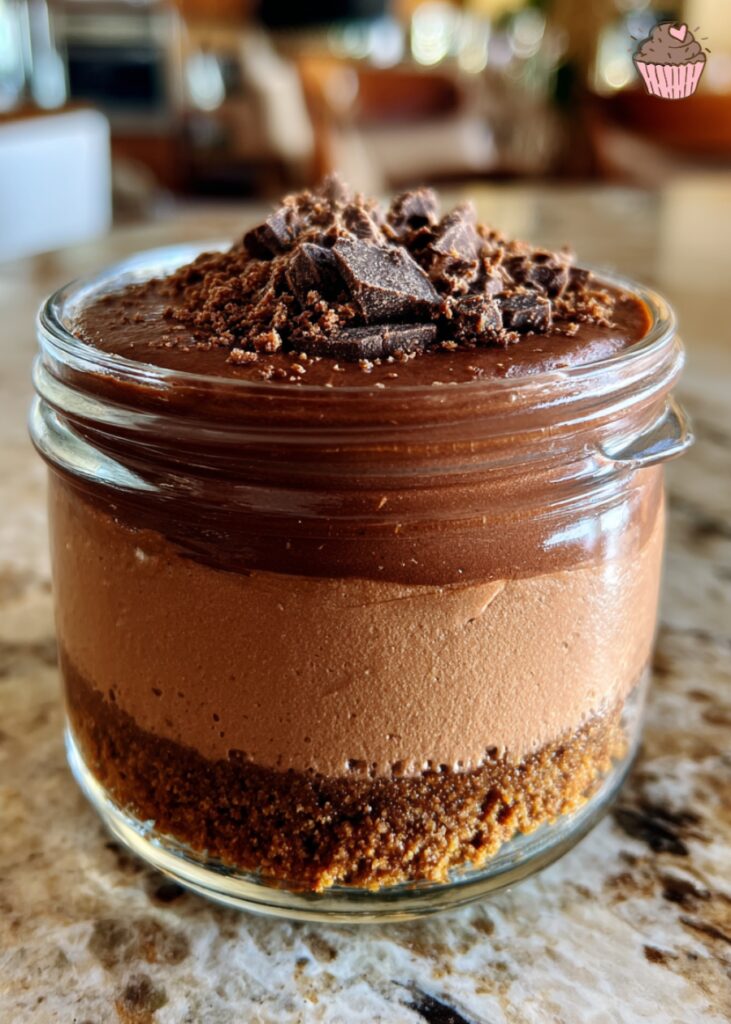
No Bake Chocolate Cheesecake Jars
If you’re someone who loves chocolate and cheesecake, you’re in for a treat! Imagine the smooth, creamy texture of cheesecake combined with the rich, indulgent flavor of chocolate, all layered into a perfectly portable jar. That’s the magic of No Bake Chocolate Cheesecake Jars — the dessert that brings together two of the most beloved treats in an easy-to-make, no-bake form. Whether you’re looking to impress guests at a party, treat yourself to a sweet escape, or find a kid-friendly dessert, this dessert fits every occasion and palate.
Why No-Bake?
The idea of no-bake desserts has gained significant popularity for a number of reasons. Traditional cheesecake often requires baking, which means waiting for the oven to do its job and the dessert to cool down before enjoying it. However, No Bake Chocolate Cheesecake Jars allow you to skip that entire process and still enjoy a creamy, rich dessert that tastes like it came straight from a high-end bakery.
Not only do they save time, but they’re also much more adaptable. By skipping the oven, you can personalize each jar with your favorite ingredients, from rich chocolate layers to various toppings like fruit, nuts, or candy. The best part is that they can be made ahead of time and stored in the fridge, making them the ultimate convenience dessert.
Ingredients You’ll Need for No Bake Chocolate Cheesecake Jars

To create the most delectable No Bake Chocolate Cheesecake Jars, you’ll need to gather a few key ingredients. Don’t worry, these items are easy to find and you’ll likely have most of them in your kitchen already. Here’s a basic list of what you’ll need:
For the Crust:
- Graham crackers (or other cookies of your choice): The base of any cheesecake needs a crust, and graham crackers offer a classic, sweet crunch.
- Butter: This helps bind the crumbs together for a firm yet crumbly base.
- Sugar: Just a bit of sweetness to complement the rich flavors of the cheesecake and chocolate.
For the Cheesecake Filling:
- Cream cheese: This provides the signature creamy texture and base for your cheesecake. Make sure it’s softened for easy mixing.
- Heavy whipping cream: This helps the cheesecake filling to become fluffy and light while adding richness.
- Powdered sugar: To sweeten the filling without creating a grainy texture.
- Vanilla extract: Adds a subtle warmth to the filling.
- Chocolate: You can use melted dark or milk chocolate, depending on your preference for a deep or lighter chocolate flavor.
For the Toppings (optional):
- Chocolate ganache: A silky-smooth ganache poured over the top adds an extra level of indulgence.
- Fresh berries: These can provide a nice tart contrast to the richness of the chocolate and cheesecake.
- Whipped cream: For that extra creamy touch on top.
- Shaved chocolate: For garnish, it brings a decadent visual appeal.
- Crushed nuts: Walnuts, almonds, or hazelnuts can bring a crunchy element to contrast the smooth filling.
Step-by-Step Instructions for No Bake Chocolate Cheesecake Jars
Now that you have your ingredients ready, it’s time to bring these No Bake Chocolate Cheesecake Jars to life. The process is fairly simple and involves creating your crust, preparing the cheesecake filling, layering everything into jars, and finally chilling to perfection.
Step 1: Prepare the Crust
- Crush the graham crackers: Start by breaking your graham crackers into small pieces. You can use a food processor for an even texture or simply place the crackers in a ziplock bag and crush them with a rolling pin.
- Mix with butter and sugar: In a medium bowl, combine the crushed graham crackers with melted butter and a tablespoon of sugar. Stir until the mixture becomes crumbly and sticky.
- Layer the crust: Spoon the graham cracker mixture into the bottom of small jars or glasses. Press down firmly with a spoon to create an even, compact base.
Step 2: Make the Cheesecake Filling
- Whisk the cream cheese: In a large mixing bowl, beat the softened cream cheese until smooth. This ensures there are no lumps in your filling.
- Add powdered sugar and vanilla: Gradually add powdered sugar and vanilla extract to the cream cheese. Continue whisking until the mixture is smooth and creamy.
- Whip the cream: In a separate bowl, whip the heavy cream until stiff peaks form. This will give the cheesecake filling its light and airy texture.
- Combine the whipped cream with the cream cheese mixture: Gently fold the whipped cream into the cream cheese mixture. Be careful not to deflate the whipped cream, as it’s the key to achieving the right texture.
- Add melted chocolate: Melt your chocolate in a microwave or over a double boiler. Let it cool slightly before folding it into the cheesecake filling for that irresistible chocolate flavor.
Step 3: Assemble the Jars
- Layer the cheesecake filling: Spoon the cheesecake mixture into the jars on top of the graham cracker crust. Use the back of a spoon to spread it evenly.
- Chill: Refrigerate the jars for at least 4 hours, but preferably overnight. This will allow the cheesecake to set, giving it that perfect creamy consistency.
Step 4: Add Toppings and Serve
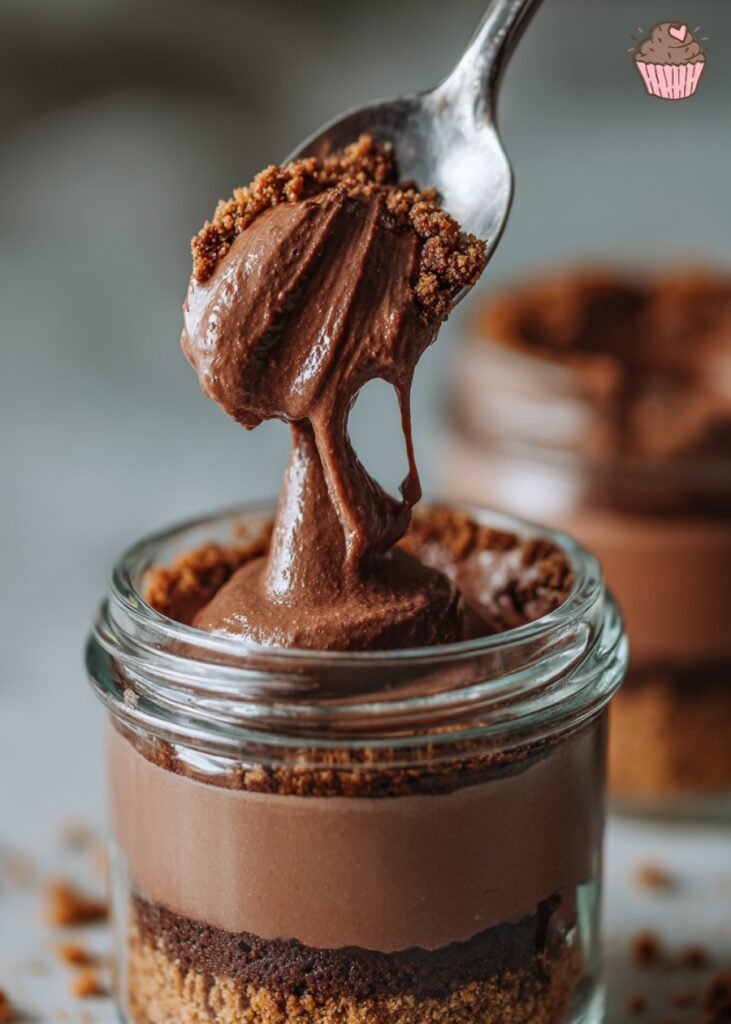
Once your No Bake Chocolate Cheesecake Jars have chilled and set, it’s time to top them off with your choice of toppings. You can go simple with a dollop of whipped cream or add a layer of chocolate ganache for a richer experience. Fresh berries, crushed nuts, or even a drizzle of caramel sauce can take these jars to the next level.
Tips and Variations for Perfect No Bake Chocolate Cheesecake Jars
While the basic recipe is delicious on its own, there are endless ways to personalize your No Bake Chocolate Cheesecake Jars. Here are a few tips and variations to inspire your creativity:
1. Mix Up the Crust
Feel free to experiment with different crusts. Instead of graham crackers, you could use chocolate cookies, vanilla wafers, or even crushed pretzels for a salty-sweet contrast.
Prefer a cookie base? Try my No Bake Chocolate Cheesecake with Oreo Crust for extra crunch and deep cocoa flavor.
2. Use Different Types of Chocolate
Dark chocolate, milk chocolate, and even white chocolate all make excellent additions to the filling. You can mix and match these to create layered chocolate effects or stick to one type for a more uniform flavor.
3. Add Flavored Extracts
For a unique twist, try adding different flavored extracts, such as almond or hazelnut, to the cheesecake filling. These will infuse a subtle yet delightful flavor into the base of your jars.
4. Make Mini Versions
If you’re serving these for a party or event, you can create mini No Bake Chocolate Cheesecake Jars that are perfect for individual servings. You can also make them in small mason jars or even shot glasses for a fun presentation.
5. Add Liquor
For an adult-friendly version, try adding a splash of liqueur to the cheesecake filling. Baileys Irish Cream, Kahlúa, or Chambord all pair wonderfully with chocolate and can give the dessert an added depth of flavor.
Why You’ll Love No Bake Chocolate Cheesecake Jars
No Bake Chocolate Cheesecake Jars are incredibly versatile, making them the perfect choice for nearly any occasion. Here are a few reasons why you’ll fall in love with them:
- Quick and Easy: No baking means less hassle and fewer dishes.
- Perfect for Summer: As a chilled dessert, it’s ideal for hot weather when you don’t want to turn on the oven.
- Customizable: You can tailor the flavors to suit your preferences.
- Make-Ahead: Prep them in advance and have them ready when you need them.
Whether you’re treating yourself after a long day or serving them at your next gathering, these No Bake Chocolate Cheesecake Jars are sure to satisfy your sweet tooth.
Print
No Bake Chocolate Cheesecake Jars
- Prep Time: 25 minutes
- Cook Time: 0 minutes
- Total Time: 4 hours 25 minutes
- Yield: 8 jars (about 6 oz/180 ml each) 1x
- Category: Dessert
- Method: No-Bake
- Cuisine: American
- Diet: Vegetarian
Description
Silky no-bake chocolate cheesecake layered over a buttery graham crust in individual jars—quick to prep, perfectly portable, and easy to customize with toppings.
Ingredients
- Crust
- 1½ cups (150 g) graham cracker crumbs
- 6 tbsp (84 g) unsalted butter, melted
- 2 tbsp (25 g) granulated sugar
- Filling
- 16 oz (450 g) cream cheese, softened
- 1 cup (240 ml) heavy whipping cream, cold
- ¾ cup (90 g) powdered sugar
- 1 tsp vanilla extract
- 6 oz (170 g) semi-sweet chocolate, melted and slightly cooled
- Optional Toppings
- Chocolate ganache (see Notes for quick recipe)
- Fresh berries
- Whipped cream
- Shaved chocolate
- Crushed nuts (walnuts, almonds, or hazelnuts)
Instructions
- Make the crust: Stir graham crumbs, melted butter, and sugar until evenly moistened. Divide among 8 small jars and press into a firm base.
- Beat the base: In a large bowl, beat softened cream cheese until smooth. Add powdered sugar and vanilla; beat until creamy.
- Whip the cream: In a separate bowl, whip cold heavy cream to stiff peaks.
- Fold & chocolate: Gently fold whipped cream into the cream cheese mixture. Fold in melted (slightly cooled) chocolate until uniform.
- Fill the jars: Spoon or pipe the filling over the crusts. Smooth the tops.
- Chill: Refrigerate at least 4 hours (overnight best) until set.
- Top & serve: Add ganache, whipped cream, berries, shaved chocolate, or nuts just before serving.
Notes
- Quick ganache: Heat ½ cup (120 ml) heavy cream to steaming, pour over 4 oz (115 g) chopped chocolate, rest 2 minutes, then stir smooth; cool slightly before topping.
- Make-ahead: Assemble up to 2 days in advance; add fresh toppings just before serving.
- Storage: Cover and refrigerate 3–4 days. Freeze (without fresh toppings) up to 2–3 months; thaw overnight in the fridge.
- Variations: Swap graham crackers for Oreo crumbs, chocolate cookies, vanilla wafers, or crushed pretzels. Use dark/milk/white chocolate, add 1–2 tsp almond or hazelnut extract, or stir in 1–2 tbsp liqueur (Baileys, Kahlúa, Chambord) for an adult twist.
- Mini jars: Pipe into 4 oz (120 ml) jars for bite-size party portions.
- Light swaps: Low-fat cream cheese works; texture will be slightly lighter.
- Gluten-free option: Use certified gluten-free cookies for the crust.
- Recommended tools (Amazon):
Nutrition
- Serving Size: 1 jar (about 6 oz/180 ml)
- Calories: 615
- Sugar: 36 g
- Sodium: 276 mg
- Fat: 46 g
- Saturated Fat: 27 g
- Unsaturated Fat: 18 g
- Trans Fat: 0.9 g
- Carbohydrates: 47 g
- Fiber: 2 g
- Protein: 6 g
- Cholesterol: 109 mg
Keywords: no bake chocolate cheesecake jars, jar dessert, make-ahead dessert, chocolate cheesecake, no-bake cheesecake, mason jar dessert, kid-friendly dessert, summer dessert, easy dessert, ganache
FAQ (Frequently Asked Questions)
It’s best to refrigerate the jars for at least 4 hours, but overnight is ideal. This allows the cheesecake filling to set properly and develop a firm yet creamy texture.
Yes, No Bake Chocolate Cheesecake Jars are perfect for make-ahead desserts. You can prepare them a day or two in advance and store them in the fridge until you’re ready to serve.
Yes, you can substitute low-fat cream cheese for the regular cream cheese. However, keep in mind that the texture and richness of the filling may be slightly lighter.
You can substitute graham crackers with other types of cookies, such as chocolate cookies, shortbread, or even vanilla wafers. Crushed pretzels are also a great option for a salty-sweet twist.
Store the jars in an airtight container in the fridge for up to 3-4 days. If you’re using any fresh toppings, it’s best to add them just before serving to keep them fresh.
Yes, you can freeze the cheesecake jars. Make sure they are tightly sealed and stored in the freezer for up to 2-3 months. When ready to serve, let them thaw in the fridge overnight.
Absolutely! Feel free to add toppings like fresh berries, whipped cream, chocolate shavings, crushed nuts, caramel sauce, or even a drizzle of espresso for a coffee twist.
Conclusion
In conclusion, No Bake Chocolate Cheesecake Jars are the ideal dessert for anyone looking for an easy, indulgent treat without the need for baking. With a simple list of ingredients and a few steps, you can create a dessert that’s not only visually stunning but also absolutely delicious. Whether you keep them for yourself or share them with friends and family, these jars will bring joy and satisfaction with every spoonful.
Recipe by Nora, Choco Kitchen Blog


