
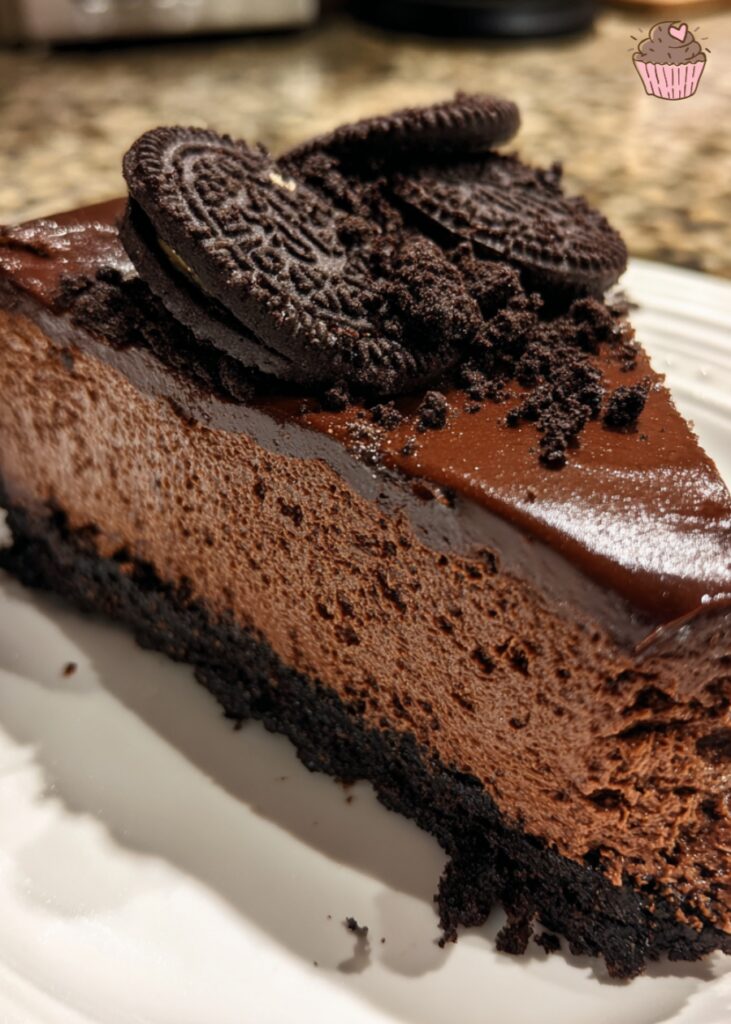
No Bake Chocolate Cheesecake with Oreo Crust
Craving something rich, chocolatey, and absolutely no-fuss? This No Bake Chocolate Cheesecake with Oreo Crust is the answer to your dessert dreams. Imagine the creamy indulgence of cheesecake combined with the irresistible crunch of Oreos—all without turning on the oven. Whether it’s a hot summer day or you’re simply in the mood for a quick and decadent treat, this no-bake wonder is perfect. It’s a dessert that feels luxurious yet incredibly easy to whip up. If you’re a chocolate lover or an Oreo addict (or both!), prepare yourself for a slice of heaven. Ready to dig in? Let’s make dessert the easiest part of your day.
Why You’ll Love This Cheesecake
There are countless reasons to fall in love with this No Bake Chocolate Cheesecake with Oreo Crust, but let’s start with the basics—it’s incredibly easy to make. No water baths, no oven, no fuss. You don’t even need to be an experienced baker to pull this off perfectly. If you can stir, chill, and pour, you’re good to go!
This cheesecake is also a make-ahead dream. Preparing dessert the day before a party or gathering means one less thing to stress about. Simply assemble, chill, and serve when you’re ready. It actually tastes even better after resting in the fridge overnight, as the flavors have time to deepen and blend.
Let’s talk about that Oreo magic. From the crisp, buttery Oreo cookie crust to the bits of cookie throughout the creamy chocolate filling, this dessert is a chocolate lover’s fantasy. The cookies provide just the right crunch to contrast with the rich and velvety filling. You’re getting Oreos in every bite—and that’s never a bad thing.
And of course, it’s crowd-pleasing. Whether you’re hosting a birthday party, holiday dinner, or casual get-together, this cheesecake never fails to impress. It’s the kind of dessert that gets people asking for seconds—and the recipe. Plus, since it’s no-bake, it’s perfect for warm weather when you want to keep your kitchen cool.
In short, it’s effortless, indulgent, and guaranteed to be a hit with chocolate and Oreo fans alike. What more could you ask for in a dessert?
Key Ingredients Explained
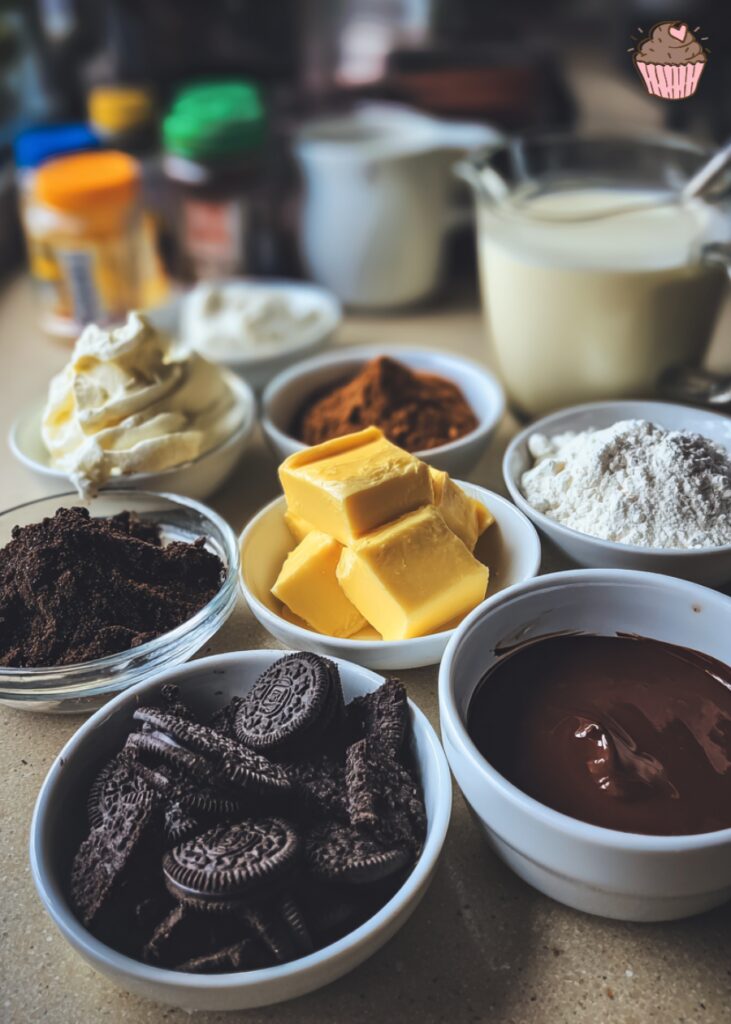
This cheesecake may look impressive, but its magic lies in a handful of familiar ingredients that come together in the most indulgent way.
Crust:
The base of this dessert is a classic no-bake Oreo crust—just crushed Oreo cookies blended with melted butter. The butter binds the crumbs, while the Oreos bring that iconic chocolatey crunch. No added sugar needed—the cookies do all the work.
Filling:
The creamy filling is rich, smooth, and packed with chocolate flavor. It starts with cream cheese, which gives the cheesecake its signature tang and dense texture. To deepen the chocolate experience, we use melted dark chocolate and unsweetened cocoa powder, creating a layered, bittersweet richness. Whipped cream is folded in to lighten the texture, giving it that airy, mousse-like feel without losing the cheesecake density. A splash of vanilla extract adds warmth and balance. And of course, we fold in crushed Oreos to carry that cookie goodness through every bite.
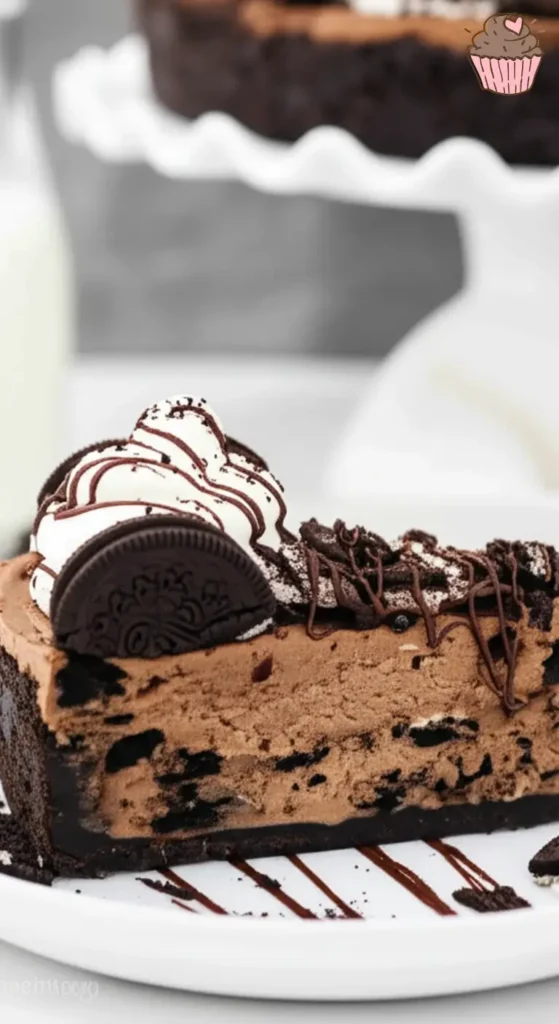
Topping:
No cheesecake is complete without a little flair. A generous swirl of whipped cream, more crushed Oreos, and a drizzle of hot fudge sauce make the perfect finishing touch. This topping not only looks beautiful—it adds extra flavor and texture that takes each bite over the top.
Each component is simple on its own, but together they create a no-bake cheesecake that feels completely decadent and unforgettable.
Step‑by‑Step Instructions
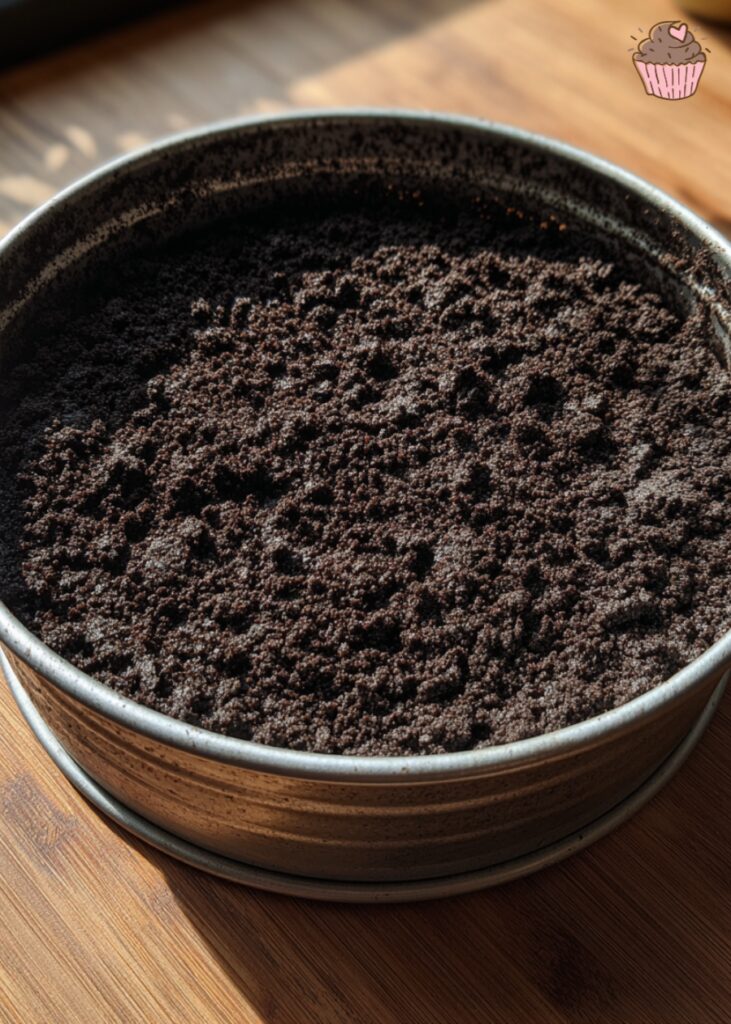
1. Make the Crust
Start by crushing about 24 Oreo cookies (cream included) into fine crumbs using a food processor or by placing them in a zip-top bag and smashing them with a rolling pin. Mix the crumbs with 6 tablespoons of melted butter until the texture resembles wet sand. Press this mixture firmly into the bottom of a 9-inch springform pan, using the bottom of a glass to smooth and compact it evenly.
Tip: Press the crust up slightly on the sides for extra structure.
Chill the crust in the fridge while you prepare the filling.
2. Melt the Chocolate
In a heatproof bowl, melt 8 oz of dark chocolate using the microwave (in 20-second bursts, stirring between each) or over a double boiler. Set aside to cool slightly—warm, not hot.
Warning: Don’t add hot chocolate to your cream cheese mixture; it can cause separation.
3. Whip the Cream
In a chilled mixing bowl, whip 1 cup of cold heavy cream to stiff peaks. This will lighten the filling. Set aside.
Tip: Don’t overwhip—stop when the cream holds its shape but still looks smooth.
4. Beat the Cream Cheese Mixture
In another large bowl, beat 16 oz of softened cream cheese until smooth. Add ½ cup powdered sugar, 2 tablespoons unsweetened cocoa powder, and 1 teaspoon vanilla extract. Beat until well combined and creamy. Scrape the sides of the bowl to ensure everything is evenly mixed.
5. Incorporate Chocolate, Whipped Cream, and Oreos
Pour in the melted (but cooled) chocolate and mix until fully blended. Gently fold in the whipped cream using a spatula to keep the mixture light and airy. Finally, fold in about ½ cup of crushed Oreos for added crunch and flavor.
Warning: Don’t overmix at this stage—just fold until combined to maintain a fluffy texture.
6. Assemble and Chill
Pour the filling over your chilled crust and smooth the top with a spatula. Cover with plastic wrap and refrigerate for at least 6 hours, preferably overnight.
Tip: Proper chilling is essential for a firm, sliceable cheesecake—don’t rush it!
7. Prepare the Topping
Right before serving, whip another ½ cup of heavy cream with a bit of powdered sugar (to taste) until stiff peaks form. This will be your decorative topping. Optionally, warm some hot fudge sauce to drizzle.
8. Decorate, Slice, and Serve
Pipe or spoon whipped cream around the edges or in the center. Garnish with extra Oreo crumbs or halves, then finish with a drizzle of hot fudge for a rich, glossy finish.
Slice with a hot knife (dip in warm water and wipe dry) for clean cuts.
Tip: Store leftovers in the fridge, covered, for up to 4 days.
Recipe Notes & Pro Tips
To ensure your no bake chocolate cheesecake comes out smooth, rich, and visually stunning, keep these tips in mind.
Start with room-temperature dairy: Cold cream cheese can lead to lumps in your filling, which are hard to smooth out later. Let your cream cheese sit out for at least 30 minutes before using.
Use high-quality chocolate bars: Skip chocolate chips—they often contain stabilizers that affect texture. Choose dark or semi-sweet chocolate bars with at least 60% cocoa for that rich, velvety finish.
Chill time is crucial: This cheesecake needs at least 6 hours in the fridge, but overnight is best. Rushing the chill time will result in a soft, unstable filling that doesn’t hold up well when sliced.
Prep your pan properly: If using a springform pan, lightly grease the bottom and line it with parchment paper. This makes it easier to release and lift the cheesecake cleanly.
Crust tips: Press the Oreo-butter mixture firmly and evenly into the pan using the bottom of a flat glass or measuring cup. This helps it hold its shape without crumbling.
Pipe like a pro: For picture-perfect whipped cream topping, use a piping bag fitted with a large star tip. Chill the bowl and beaters before whipping cream for the fluffiest texture.
Avoid overmixing: When folding in whipped cream and crushed Oreos, be gentle. Overmixing deflates the air and can lead to a dense or grainy texture.
These small steps make a big difference in texture, presentation, and flavor!
Storage & Make‑Ahead Tips
This no bake chocolate cheesecake is perfect for making ahead—just one more reason to love it! Once assembled, store it covered in the refrigerator for up to 2 days. It stays fresh and delicious, making it ideal for prepping before a party or gathering. For best texture and flavor, add the whipped cream and toppings just before serving to keep them looking and tasting their best.
If you’d like to make it further in advance, this cheesecake also freezes beautifully. Wrap the fully set cheesecake (without toppings) tightly in plastic wrap and foil, then freeze for up to 1 month. When you’re ready to serve, thaw it overnight in the fridge. Avoid microwaving to thaw, as it can affect the texture.
Before slicing, let the cheesecake sit at room temperature for about 15 minutes for cleaner cuts. Add any decorative whipped cream, extra Oreos, or hot fudge right before serving to preserve their shape and flavor.
Print
No Bake Chocolate Cheesecake with Oreo Crust
- Prep Time: PT25M
- Cook Time: PT0M
- Total Time: PT6H25M
- Yield: 12 servings 1x
- Category: Dessert
- Method: No Bake
- Cuisine: American
- Diet: Vegetarian
Description
A rich, creamy, and indulgent no-bake chocolate cheesecake made with a buttery Oreo cookie crust, a luscious dark chocolate cream cheese filling, and topped with whipped cream and extra Oreos. Perfect for make-ahead entertaining or an easy summer dessert.
Ingredients
- 24 Oreo cookies (for crust)
- 6 tbsp unsalted butter, melted
- 8 oz dark chocolate, chopped and melted
- 16 oz (2 blocks) cream cheese, room temperature
- 1/2 cup granulated sugar
- 1/4 cup unsweetened cocoa powder
- 1 tsp vanilla extract
- 1 1/2 cups heavy whipping cream
- 10 crushed Oreos (for filling)
- Whipped cream (for topping)
- Extra Oreos and hot fudge (optional for garnish)
Instructions
- Line the bottom of a 9-inch springform pan with parchment paper. Lightly grease the sides.
- Crush 24 Oreos in a food processor until fine. Mix with melted butter and press into the bottom of the pan. Chill in fridge while preparing filling.
- Melt the chopped chocolate using a microwave-safe bowl or double boiler. Let it cool slightly.
- In a separate bowl, whip the heavy cream until stiff peaks form. Set aside.
- Beat cream cheese until smooth. Add sugar, cocoa powder, and vanilla. Mix well.
- Pour in the melted chocolate and beat until combined. Gently fold in whipped cream and crushed Oreos.
- Spoon the filling over the prepared crust and smooth the top. Chill for at least 6 hours or overnight.
- Before serving, top with whipped cream, extra Oreos, and drizzle with hot fudge if desired. Slice and enjoy.
Notes
- Use room-temperature cream cheese to avoid lumps.
- Chill the cheesecake thoroughly for best texture and clean slices.
- Use high-quality chocolate bars for rich flavor—avoid chocolate chips.
- Springform pans make for easy removal and neat presentation.
- Use a hot knife for slicing clean pieces.
- Recommended tools (affiliate links): 9” springform pan, electric mixer, food processor, mixing bowls, spatula, offset spatula, piping bag
Nutrition
- Serving Size: 1 slice
- Calories: 520
- Sugar: 32g
- Sodium: 310mg
- Fat: 38g
- Saturated Fat: 21g
- Unsaturated Fat: 13g
- Trans Fat: 1g
- Carbohydrates: 44g
- Fiber: 2g
- Protein: 6g
- Cholesterol: 95mg
Keywords: no bake chocolate cheesecake, Oreo cheesecake, no bake dessert, easy summer dessert, chocolate Oreo dessert
FAQs
The cheesecake needs at least 6 hours in the fridge to fully set—overnight is best. If it’s still soft, it may be due to under-whipped cream or warm ingredients. Always use room-temperature cream cheese and whip the cream to soft peaks.
Yes, you can place the cheesecake in the freezer for 1–2 hours to help it set more quickly, but avoid freezing it solid unless you plan to store it long-term. Always thaw slightly before slicing for clean cuts.
Absolutely. Cool Whip is a convenient substitute and helps stabilize the filling. Use the same quantity (about 2 cups) in place of freshly whipped cream.
A 9″ springform pan works best for the full recipe. You can halve it and use a 6″ or 7″ pan for a smaller version.
This recipe doesn’t call for white chocolate, but if modifying a layered version, you can omit or swap it with milk chocolate. Just ensure the texture stays creamy.
Whether you’re celebrating something special or simply craving a rich, no-fuss dessert, this no-bake chocolate Oreo cheesecake is sure to impress. With its creamy filling, crunchy cookie crust, and chocolatey finish, it hits every indulgent note—no oven required! I love seeing how others bring this recipe to life, so don’t forget to share your creations. Tag me on Instagram or Pinterest, leave a comment with your thoughts, or tell me how you made it your own. Maybe you swapped in mint Oreos or added a drizzle of peanut butter—go wild! However you enjoy it, this cheesecake is made to be shared and savored. Happy no-baking!
Recipe by Nora, Choco Kitchen Blog


2 Comments