
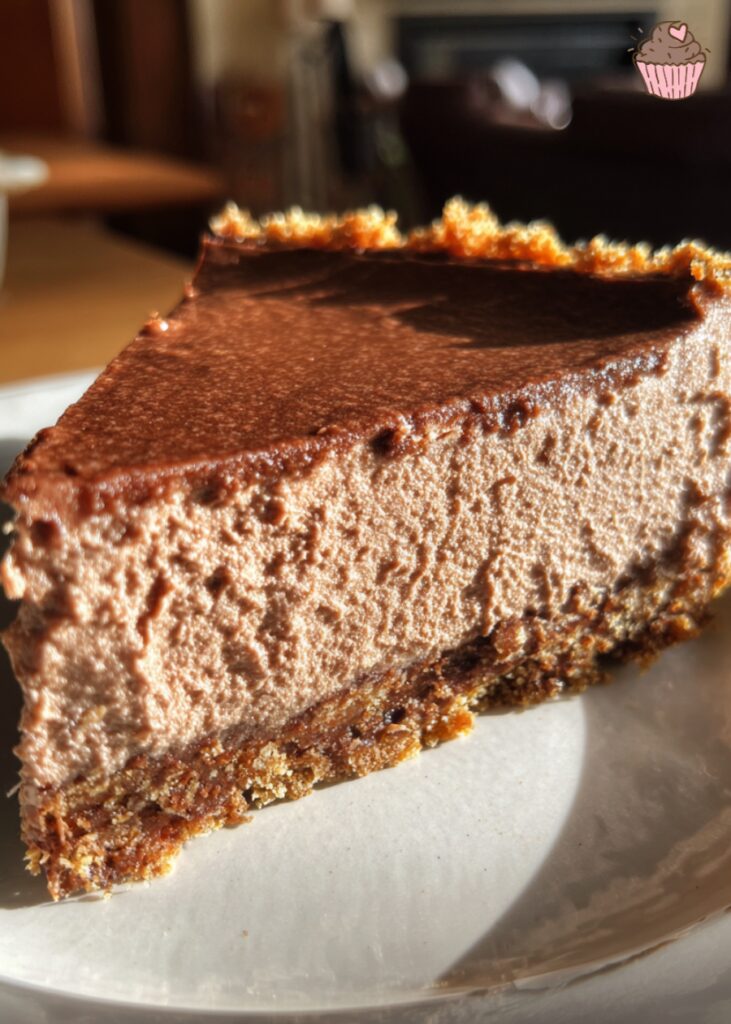
No Bake Nutella Cheesecake
There’s something magical that happens when you combine cream cheese, Nutella, and absolutely zero oven time. I discovered this truth on a sweltering summer afternoon when the thought of turning on my oven felt like cruel and unusual punishment. What started as a desperate attempt to satisfy my chocolate cravings without heating up my kitchen turned into what I now consider my greatest dessert revelation.
This no-bake Nutella cheesecake isn’t just convenient – it’s genuinely superior to its baked counterpart. I know that’s a bold statement coming from someone who usually swears by traditional baking methods, but hear me out. When you skip the oven, something extraordinary happens: the Nutella flavor stays pure, intense, and utterly irresistible. Instead of the muted, cooked-down taste you get from baking, every spoonful delivers that signature chocolate-hazelnut punch that makes Nutella so addictive.
The texture? Imagine the most luxurious chocolate mousse you’ve ever tasted, but with the satisfying richness of classic cheesecake. It’s creamy, airy, and melts on your tongue in the most delightful way. This isn’t just a dessert – it’s an experience that’ll have your guests asking for the recipe before they’ve finished their first bite.
Essential Ingredients Breakdown
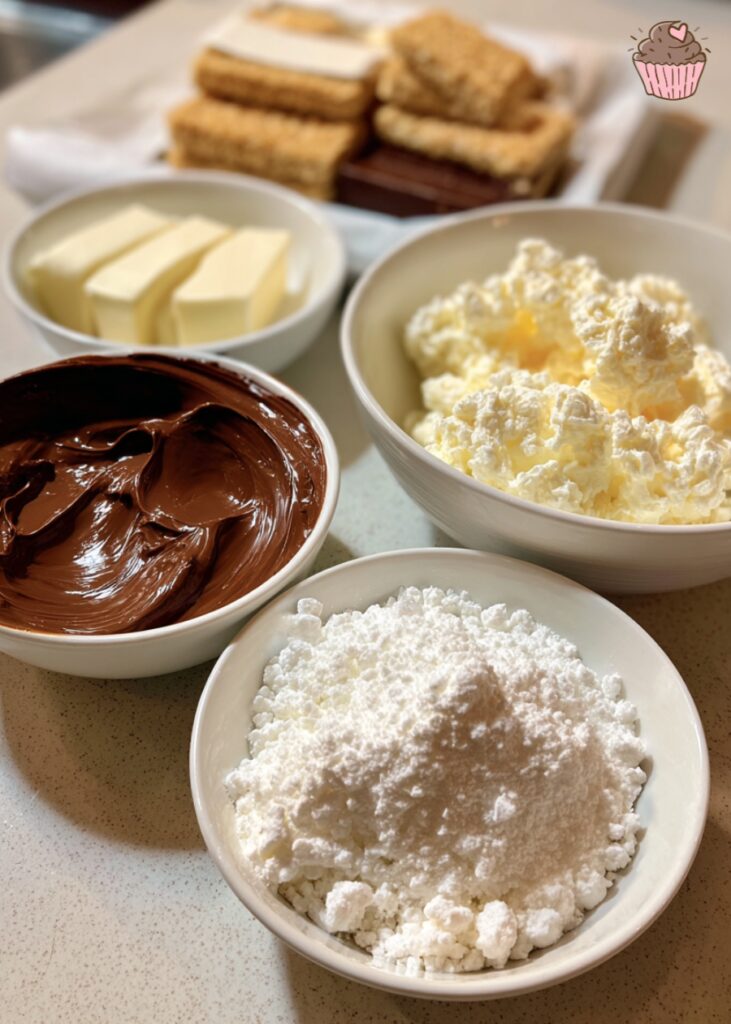
The beauty of this recipe lies in its simplicity – we’re working with just a handful of high-quality ingredients that each play a crucial role in creating dessert perfection.
Nutella is obviously our star player, and you’ll need a generous amount – about 1.5 cups total. Don’t even think about substituting with a different chocolate-hazelnut spread; Nutella’s specific balance of cocoa, hazelnuts, and sugar is what makes this recipe sing. I always use fresh jars because Nutella can develop a slightly granular texture when it’s been sitting around too long.
Cream cheese forms the foundation of our cheesecake filling, and this is where quality absolutely matters. I swear by Philadelphia cream cheese in the brick form – not the spreadable tub variety. The brick form has the perfect consistency and tang that balances the sweetness of Nutella beautifully. Make sure it’s completely softened before you start; I usually leave mine on the counter for about 2 hours before baking.
Heavy cream does double duty in this recipe. We’ll whip some to fold into the filling for that light, airy texture, and use more for the ganache topping. Always use cream with at least 35% fat content – anything lower won’t whip properly or give you the rich mouthfeel we’re after.
Gelatin powder is our secret weapon for achieving the perfect set without baking. It creates that firm-yet-creamy texture that’s the hallmark of great cheesecake. I prefer unflavored gelatin powder over sheets because it dissolves more consistently and is easier to measure.
For the crust, chocolate sandwich cookies are ideal – I love using Oreos for their deep chocolate flavor and perfect crumb texture when processed. The contrast between the dark, crispy base and the creamy Nutella filling is absolutely divine.
Powdered sugar adds sweetness and helps create that silky smooth texture in our filling. Sift it if it’s lumpy – we want everything perfectly smooth.
Finally, chopped hazelnuts for garnish aren’t just decorative – they add a delightful crunch and amplify that hazelnut flavor that makes Nutella so irresistible.
Kitchen Tools & Equipment You’ll Need
Success with this cheesecake starts with having the right tools. A 9-inch springform pan is absolutely essential – the removable sides make unmolding so much easier, and you’ll thank yourself later when you’re presenting this beauty intact.
You’ll need a good food processor for the crust and a stand mixer or hand mixer for the filling. A rubber spatula is crucial for folding the whipped cream gently into the Nutella mixture without deflating all those lovely air bubbles we worked hard to create.
Here’s a pro tip I learned the hard way: line your springform pan with parchment paper, including the sides. It makes removal foolproof and gives you those clean, professional-looking edges that’ll make you look like a pastry chef.
Step-by-Step Method: Creating the Perfect Base
The foundation of any great cheesecake is its crust, and for our Nutella version, we want something that complements rather than competes with that chocolate-hazelnut flavor.
Step 1: Process the Cookies
Start by crushing about 30 chocolate sandwich cookies in your food processor until they form fine, even crumbs – think coarse sand texture. You don’t want chunks, but you also don’t want powder. Pulse in short bursts to maintain control over the texture.
Step 2: Add the Butter
Melt 5 tablespoons of butter and drizzle it over the crumbs while the processor is running. The mixture should hold together when squeezed but not be overly wet or greasy. If it seems too dry, add another tablespoon of melted butter.
Step 3: Press Into Pan
Press this mixture firmly into the bottom of your prepared springform pan. I use the bottom of a measuring cup to get an even, compact layer. The key is applying enough pressure so the crust holds together when cut, but not so much that it becomes rock-hard.
Step 4: Chill the Base
Pop the crust in the refrigerator while you prepare the filling – this helps it set and makes the final assembly much easier.
Mastering the Nutella Mousse Filling
This is where the magic happens, and timing is everything.
Bloom the Gelatin
Start by blooming your gelatin: sprinkle 2 teaspoons of unflavored gelatin powder over 3 tablespoons of cold water and let it sit for 5 minutes until it looks spongy and thick.
Beat the Cream Cheese Base
While that’s blooming, beat your softened cream cheese until it’s completely smooth and fluffy – about 2 minutes with a hand mixer. Scrape down the sides of the bowl frequently; you don’t want any lumps in your final cheesecake.
Add Nutella and Sugar
Add 1 cup of Nutella and ½ cup of sifted powdered sugar to the cream cheese. Beat until completely combined and the mixture looks like the most delicious chocolate mousse you’ve ever seen. This is the moment when your kitchen starts smelling absolutely incredible.
Incorporate the Gelatin
Now, microwave your bloomed gelatin for about 15 seconds until it’s completely liquid, then quickly beat it into the Nutella mixture. Work fast here – you don’t want the gelatin to start setting before it’s fully incorporated.
Whip the Cream
In a separate bowl, whip 1 cup of heavy cream to stiff peaks. This is crucial for the light texture we’re after. Under-whipped cream won’t provide enough structure, while over-whipped cream will give you a grainy texture.
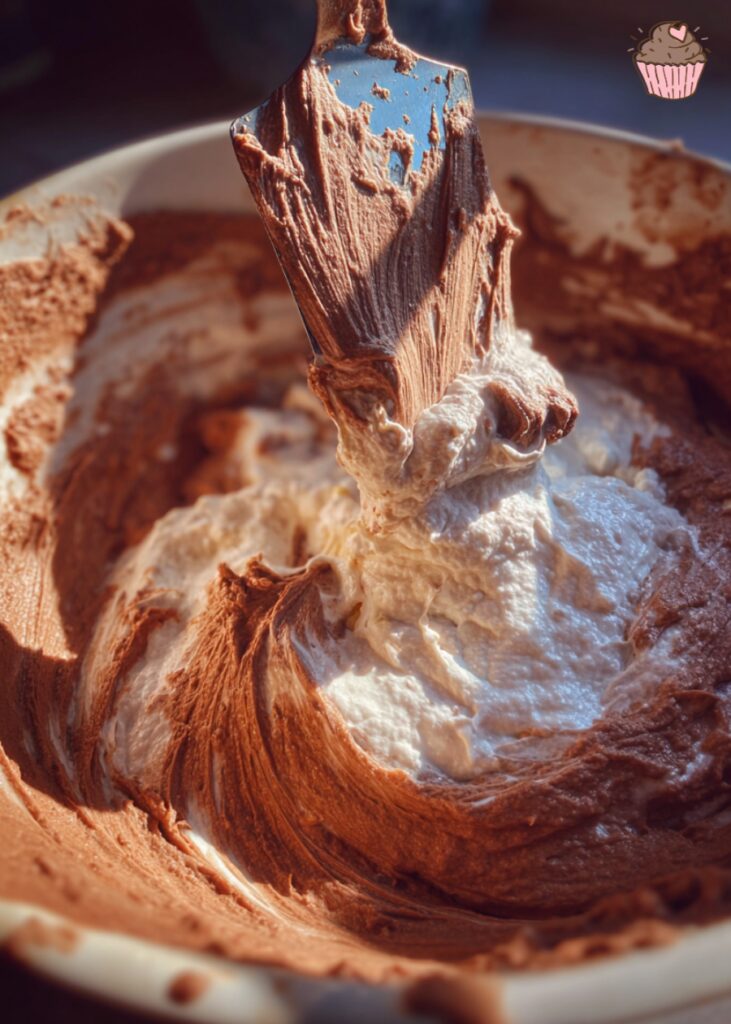
Fold Everything Together
Here’s where technique really matters: fold one-third of the whipped cream into the Nutella mixture using a rubber spatula and gentle, sweeping motions. Once that’s incorporated, fold in the remaining cream in two more additions. The goal is to maintain as much air as possible while achieving a uniform color and texture.
Pour and Smooth
Pour this heavenly mixture over your chilled crust and smooth the top with an offset spatula. The filling should look smooth and luxurious, like something you’d find in a high-end patisserie.
The Ganache Layer: Your Chocolate Crown
After your cheesecake has chilled for at least 2 hours and the filling is set but still slightly soft to the touch, it’s time for the pièce de résistance – the Nutella ganache topping.
Make the Ganache
In a microwave-safe bowl, combine ½ cup heavy cream, ½ cup Nutella, and ⅓ cup dark chocolate chips. Microwave in 30-second intervals, stirring between each, until the mixture is smooth and glossy. The ganache should pour easily but not be so thin that it runs off the sides of your cheesecake.
Cool and Pour
Let the ganache cool for about 10 minutes – you want it warm enough to pour smoothly but not so hot that it melts your carefully set filling. Pour it over the center of your cheesecake and use a gentle tilting motion to encourage it to flow evenly to the edges.
The ganache layer should be about ¼ inch thick – substantial enough to make an impact but not so thick that it overwhelms the delicate filling beneath. Don’t worry if it’s not perfectly smooth; a few gentle swirls and ripples actually add to the homemade charm.
Assembly, Setting & Final Touches
Final Chill
Once your ganache is poured, resist the urge to move or jiggle the pan – you want that top layer to set as smoothly as possible. Return the cheesecake to the refrigerator for at least 4 hours, though overnight is even better.
Prepare for Serving
When you’re ready to serve, remove the cheesecake from the refrigerator and let it sit at room temperature for about 10 minutes. This brief warming makes it easier to cut clean slices and allows the flavors to bloom.
Add Final Decorations
For the final decoration, I like to pipe rosettes of freshly whipped cream around the edge and sprinkle chopped, toasted hazelnuts over the entire surface. A final drizzle of slightly warmed Nutella creates those beautiful, Instagram-worthy patterns that’ll have everyone reaching for their phones before their forks.
Remove from Pan
To remove from the springform pan, run a thin knife around the edges first, then carefully release the spring mechanism. The parchment paper lining should make this step foolproof, but go slowly and trust the process.
Storage, Serving & Troubleshooting Tips
This No Bake Nutella Cheesecake needs to live in the refrigerator – the no-bake nature means it will soften significantly at room temperature. It’ll keep beautifully for up to 5 days covered, though I doubt it’ll last that long.
For the cleanest slices, use a sharp knife dipped in warm water and wiped clean between each cut. The ganache layer can be a bit soft, so don’t expect bakery-perfect edges – the slightly rustic look is part of its charm.
If your filling seems too soft even after proper chilling time, you might need to increase the gelatin slightly next time. If it’s too firm, reduce the gelatin by half a teaspoon. Every brand of cream cheese behaves slightly differently, so don’t be afraid to adjust.
For a cozy pairing, whip up a mug of Old-Fashioned Hot Cocoa Mix alongside each slice.
Print
No Bake Nutella Cheesecake
- Prep Time: 30 minutes
- Cook Time: 0 minutes
- Total Time: 4 hours 30 minutes (including chilling)
- Yield: 12 servings 1x
- Category: Dessert
- Method: No-Bake
- Cuisine: American
- Diet: Vegetarian
Description
A rich, creamy no-bake Nutella cheesecake with a chocolate cookie crust and decadent Nutella ganache topping. This dessert delivers intense chocolate-hazelnut flavor with a luxurious mousse-like texture that’s impossible to achieve with traditional baking methods.
Ingredients
- 30 chocolate sandwich cookies (like Oreos)
- 5–6 tablespoons melted butter
- 24 oz (3 blocks) cream cheese, softened
- 1.5 cups Nutella, divided (1 cup for filling, 0.5 cup for ganache)
- 0.5 cup powdered sugar, sifted
- 2 teaspoons unflavored gelatin powder
- 3 tablespoons cold water
- 1.5 cups heavy cream, divided (1 cup for filling, 0.5 cup for ganache)
- 0.33 cup dark chocolate chips
- Chopped toasted hazelnuts for garnish
- Whipped cream for decoration (optional)
Instructions
- Process chocolate cookies in food processor until fine crumbs form
- Add melted butter and mix until crumbs hold together when squeezed
- Press mixture firmly into bottom of 9-inch springform pan lined with parchment paper
- Chill crust in refrigerator while preparing filling
- Bloom gelatin by sprinkling over cold water, let sit 5 minutes until spongy
- Beat softened cream cheese until smooth and fluffy, about 2 minutes
- Add 1 cup Nutella and powdered sugar, beat until combined
- Microwave bloomed gelatin for 15 seconds until liquid, quickly beat into Nutella mixture
- In separate bowl, whip 1 cup heavy cream to stiff peaks
- Fold whipped cream into Nutella mixture in three additions using gentle motions
- Pour filling over chilled crust and smooth top with offset spatula
- Chill for at least 2 hours until set but slightly soft
- For ganache: microwave 0.5 cup cream, 0.5 cup Nutella, and chocolate chips in 30-second intervals until smooth
- Cool ganache 10 minutes, then pour over cheesecake center and tilt to spread evenly
- Chill for at least 4 hours or overnight
- Before serving, let sit at room temperature 10 minutes
- Run knife around edges, remove from springform pan, garnish with hazelnuts and whipped cream
Notes
- Use Philadelphia cream cheese in brick form, not spreadable tub variety
- Make sure cream cheese is completely softened but still cool before mixing
- Don’t substitute other chocolate spreads for Nutella – the specific balance is crucial
- Line springform pan with parchment paper including sides for easy removal
- For clean slices, use sharp knife dipped in warm water, wiped clean between cuts
- Cheesecake improves with time – best made at least one day ahead
- Can be made into mini cheesecakes using muffin tin with paper liners
- Store covered in refrigerator up to 5 days
- Recommended tools (affiliate links): Cuisinart Elemental 8-Cup Food Processor, KitchenAid Artisan Stand Mixer, Nordic Ware Leakproof Springform Pan 9-inch, OXO Good Grips 3-Piece Mixing Bowl Set, Ateco Offset Spatula Set, Pyrex Glass Measuring Cups, Rubbermaid Easy Find Lids Food Storage
Nutrition
- Serving Size: 1 slice (1/12 of cheesecake)
- Calories: 485
- Sugar: 32g
- Sodium: 280mg
- Fat: 35g
- Saturated Fat: 18g
- Unsaturated Fat: 15g
- Trans Fat: 0g
- Carbohydrates: 38g
- Fiber: 2g
- Protein: 8g
- Cholesterol: 95mg
Keywords: no-bake cheesecake, Nutella cheesecake, chocolate hazelnut dessert, summer dessert, easy cheesecake, mousse cheesecake, ganache topping, make-ahead dessert
Frequently Asked Questions
Absolutely! This cheesecake actually improves with time. I recommend making it at least one day ahead – the flavors meld together beautifully, and the texture becomes even more luxurious. It keeps perfectly in the refrigerator for up to 5 days when properly covered.
You can substitute with gelatin sheets (use 1.5 sheets instead of 2 teaspoons powder), but the powder is much easier to work with and dissolves more consistently. If you’re vegetarian, agar powder works too – use 1 teaspoon instead of 2 teaspoons gelatin.
While you technically can, I really don’t recommend it. Nutella has a very specific balance of sweetness, chocolate intensity, and hazelnut flavor that other spreads don’t replicate. The texture and taste will be noticeably different with substitutions.
This usually happens when the gelatin isn’t properly bloomed or dissolved, or if your cream cheese was too warm when mixing. Make sure to follow the gelatin instructions exactly, and always use cold cream cheese straight from the fridge (softened, but still cool).
Yes, but the texture changes slightly – it becomes a bit denser after thawing. If you do freeze it, wrap it tightly and freeze for up to 2 months. Thaw slowly in the refrigerator overnight before serving.
Use a sharp, thin knife dipped in warm water between each cut. Wipe the blade clean with a damp towel after each slice. The key is working with a warm knife and being patient with each cut.
Definitely! Use a muffin tin lined with paper cups. Reduce the chilling time to about 2 hours since the smaller portions set faster. You’ll get about 12 individual cheesecakes from this recipe.
If it’s too thick, warm it gently and add a tablespoon of cream. If it’s too thin, let it cool for longer, or add a bit more chocolate. Remember, it should pour easily but not run off the edges of your cheesecake.
Ready to Create Your Own Chocolate Masterpiece?
I hope you’re as excited as I am to make this incredible no-bake Nutella cheesecake! There’s truly nothing like the satisfaction of creating something this impressive without even turning on your oven. The combination of that rich, mousse-like filling with the decadent ganache topping creates a dessert that’s restaurant-quality but completely achievable in your own kitchen.
I’d love to see your creations! When you make this cheesecake, snap a photo and share it with me on social media – tag @chocokitchen and use #NoelasNutellaCheesecake. Seeing your beautiful results always makes my day, and I love celebrating your chocolate victories with you.
Have questions or want to share your own tips? Drop a comment below! I read every single one and love connecting with fellow chocolate enthusiasts. Whether you discovered a brilliant variation, ran into a challenge, or just want to rave about how amazing it turned out, I want to hear from you.
Want more irresistible no-bake desserts? Subscribe to my newsletter for exclusive recipes, behind-the-scenes kitchen stories, and my best chocolate secrets delivered straight to your inbox. Plus, you’ll be the first to know about new recipe releases and special chocolate tips that I only share with my inner circle.
Until next time, keep creating those sweet moments that make life delicious. Happy baking (or should I say, happy not baking)!
With chocolate love,
Recipe by Nora, Choco Kitchen Blog


2 Comments