
Old-Fashioned Hot Cocoa Mix
There’s something deeply nostalgic about a mug of hot cocoa on a chilly day—the kind of comfort that wraps around you like a warm blanket. I still remember coming in from playing in the snow as a kid, cheeks rosy and fingers frozen, to find a steaming cup of cocoa waiting for me on the kitchen table. The swirl of rich chocolate against creamy milk, the faint scent of vanilla in the air—it was magic in a mug. And it wasn’t the kind from a packet; it was homemade, stirred together with love and a wooden spoon.
Now that I’m older, that tradition hasn’t faded. If anything, it’s become more meaningful. I’ve found that making your own hot cocoa mix is not only incredibly easy—it’s also far better than anything you’ll buy at the store. No preservatives, no mystery ingredients—just real cocoa, sugar, milk powder, and a pinch of salt to bring it all to life.
Whether you’re looking to stock your pantry for cozy nights in or want to create thoughtful DIY gifts for loved ones, this old-fashioned hot cocoa mix brings homemade warmth to every cup. One sip, and you’ll taste the difference. It’s rich, velvety, and deeply satisfying—the kind of drink that doesn’t just warm your hands, but your heart too.
Why You’ll Love This Hot Cocoa Mix
There are so many reasons to keep a jar of this homemade hot cocoa mix in your kitchen—it’s the perfect cozy essential. First off, it’s completely shelf-stable, so you can make a big batch and enjoy it all season long. Just scoop, stir, and sip! It also makes a thoughtful gift—package it in a cute jar or bag, tie it with ribbon, and you’ve got an easy, heartfelt present for teachers, neighbors, or friends.
What really sets this cocoa mix apart is the taste. Unlike store-bought packets that often include fillers and artificial flavors, this mix uses simple, real pantry staples. That means a richer chocolate flavor and smoother texture in every cup. The balance of sweetness and creaminess is just right—and you can even tweak it to match your taste.
Kids love it, grown-ups crave it, and it’s a lifesaver when you want a warm treat without much fuss. Whether you’re curling up with a book, hosting a winter gathering, or just need something sweet after dinner, this mix is always ready. Once you try it, you’ll wonder why you ever settled for anything less.
Ingredient Breakdown
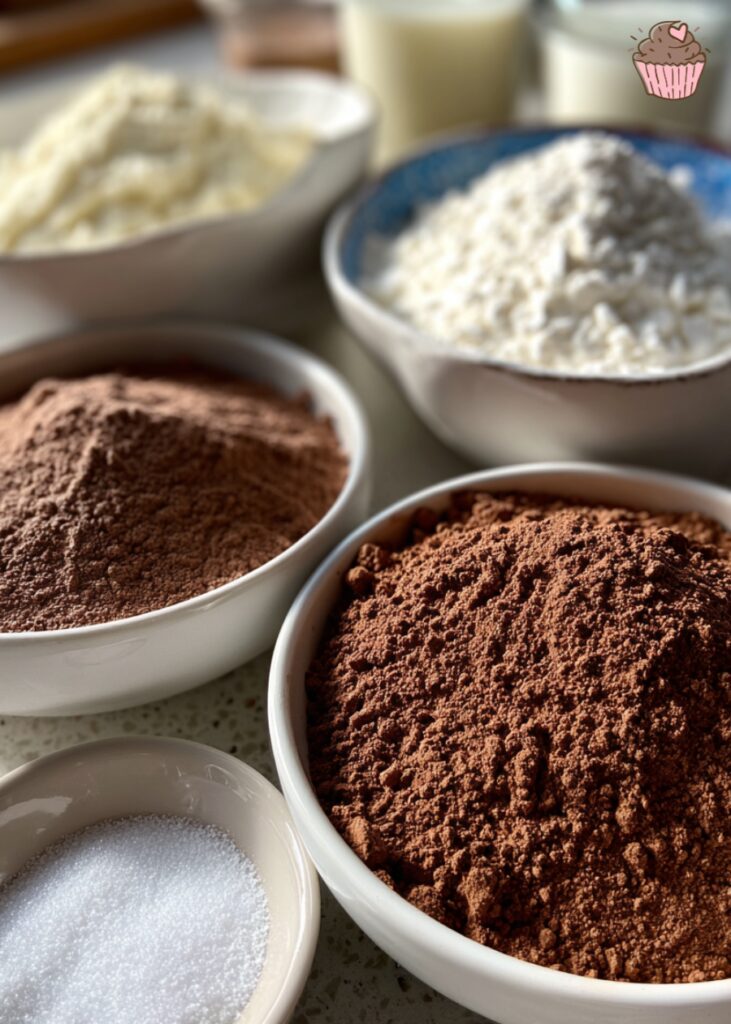
Making the perfect old-fashioned hot cocoa mix starts with understanding what each ingredient brings to the cup. Here’s a breakdown of the essential components that create that rich, velvety chocolate drink you’ll want to cozy up with all season long.
Powdered Sugar:
This is your sweetener of choice—and for good reason. Powdered sugar dissolves quickly and evenly in both hot water and milk, avoiding the gritty texture that sometimes comes from granulated sugar. It also gives the mix a smoother consistency.
Cocoa Powder:
This is where the deep, chocolatey flavor shines through. You can use either natural cocoa powder or Dutch-process cocoa. Natural cocoa is a bit sharper and more acidic, while Dutch-process gives a smoother, deeper flavor and darker color. Choose based on your preference—or use a blend of both!
Powdered Milk:
This is the secret to turning your mix into a creamy, comforting drink without needing to add fresh milk each time. It gives the cocoa a rich body and full mouthfeel, which is especially important if you’re mixing with hot water instead of milk.
Cornstarch:
It might seem unusual in a cocoa mix, but a little bit of cornstarch adds silkiness to the final drink. It acts as a gentle thickener, giving the hot cocoa that indulgent texture you typically find in café-style versions.
Salt:
Just a pinch! Salt enhances the chocolate flavor and balances the sweetness. You might not taste it directly, but you’d notice if it weren’t there.
Optional Add-Ins:
Make your mix your own by stirring in a dash of ground cinnamon, a scoop of instant espresso powder for a mocha twist, or even tossing in mini marshmallows so they’re ready to melt the moment you add hot liquid.
How to Make the Hot Cocoa Mix (Step-by-Step)
Making your own hot cocoa mix at home is incredibly easy and totally satisfying. Once you’ve got your ingredients ready, it comes together in just a few minutes—and you’ll have a delicious, cozy drink mix on hand for weeks. Here’s how to make it:
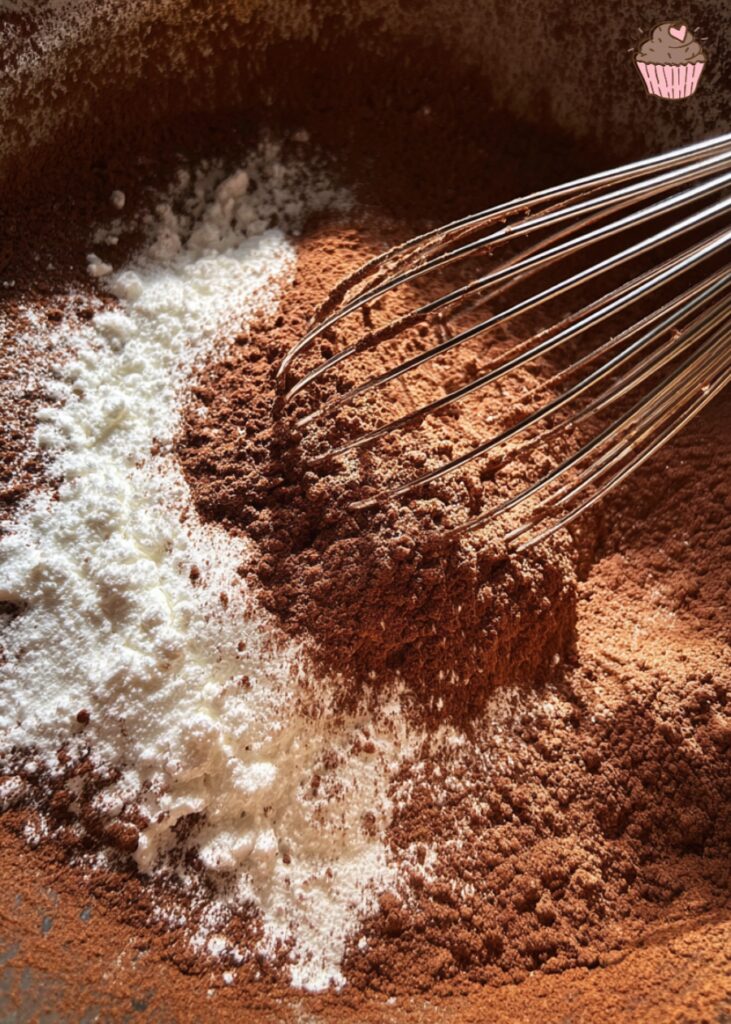
Step 1: Sift dry ingredients together
In a large mixing bowl, sift together the powdered sugar, cocoa powder, powdered milk, cornstarch, and salt. This ensures everything blends smoothly and prevents clumps later when mixing with hot liquid. Sifting also helps distribute the cocoa evenly throughout the sugar and milk base.
Step 2: Stir until completely combined
Using a whisk or wooden spoon, gently stir all the ingredients until they’re fully mixed. Make sure no streaks of cocoa or powdered milk remain. If you’re adding spices like cinnamon or espresso powder, now is the time to incorporate them evenly into the mix.
Step 3: Store in an airtight container
Transfer the finished mix into an airtight glass jar, container, or sealed bag. Store it in a cool, dry place like your pantry. Properly stored, the mix will stay fresh and flavorful for up to three months—perfect for gifting or sipping all winter long.
Step 4: Mix with hot water or milk to serve
To make a mug of cocoa, add about 3 tablespoons of your mix to a cup of hot water or hot milk. Stir until completely dissolved and smooth. Using milk (dairy or plant-based) will result in a creamier, more indulgent cup, while water keeps it lighter. Adjust the amount of mix based on your desired richness.
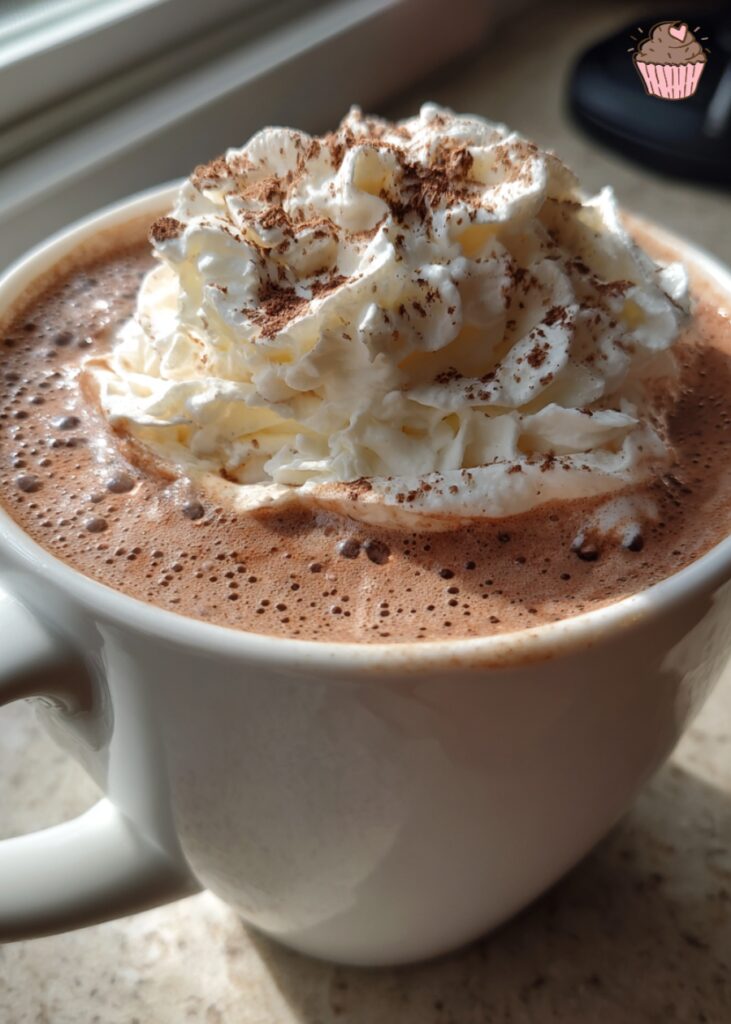
Step 5: Add optional toppings and stir
Top off your homemade cocoa with mini marshmallows, whipped cream, a sprinkle of cinnamon, or chocolate shavings. Stir again to melt everything into a dreamy, decadent drink. Don’t forget to snap a photo—it’s just too pretty not to share!
Tips for Best Results
To get the most delicious cup of homemade hot cocoa every single time, here are a few simple tips to keep in mind:
Mix thoroughly to avoid clumps:
Clumpy cocoa isn’t fun. Make sure to sift your dry ingredients before storing and stir the mix well before each scoop. This helps everything stay evenly distributed, especially the cocoa and powdered milk.
Use hot milk for a richer result:
While hot water works in a pinch, using hot milk—or your favorite dairy-free alternative—takes your cocoa to the next level. The added creaminess creates that classic, indulgent texture we all love in a cup of hot chocolate.
Customize with extracts:
Add a few drops of pure vanilla extract or peppermint extract after mixing with hot liquid for a flavor twist. Even almond or coconut extract can be fun and festive depending on your mood or the season.
Shake before each use:
If you’re storing your mix in a jar or container for later use, give it a quick shake or stir before each scoop. Some of the finer powders like cocoa or sugar can settle, and this ensures every cup is perfectly blended.
These tiny touches make all the difference!
Variations & Add-Ins
One of the best things about making your own hot cocoa mix is how easy it is to customize. Here are some fun and delicious variations to try:
Mini Chocolate Chips:
Add a handful of mini semi-sweet or dark chocolate chips to your mix for little pockets of melty goodness in every sip. They melt just enough to add richness and texture.
Vegan Version:
Swap regular powdered milk with a non-dairy powdered milk alternative like coconut milk powder or soy milk powder. Be sure to also use dairy-free chocolate chips if you’re adding those in.
Mexican Hot Chocolate Twist:
Add a pinch of cayenne pepper or chili powder along with a dash of cinnamon to bring warmth and subtle spice. It’s cozy with just the right kick.
Gift-Ready Mason Jar Layers:
For a thoughtful homemade gift, layer the cocoa mix, mini marshmallows, chocolate chips, and a festive ribbon in a mason jar. Add a cute tag with instructions, and you’ve got a cozy present ready to go.
Crushed Peppermint:
For a festive holiday version, mix in crushed peppermint candies or candy canes. They melt into the cocoa and add a cool, refreshing minty finish.
How to Store It
To keep your homemade hot cocoa mix fresh and flavorful, store it in an airtight container in a cool, dry place—away from moisture and heat. A pantry or cupboard works perfectly. If you’re using it frequently, a large glass jar with a tight lid not only keeps it fresh but also looks beautiful on the kitchen counter.
The mix stays good for up to 3 months, so you can make a big batch and enjoy cozy mugs of cocoa all season long. If you notice the ingredients settling or separating a bit, just give the mix a quick stir before scooping.
For gifting, use smaller glass jars or mason jars with a ribbon and handwritten label—it adds a personal and charming touch that recipients will love. Homemade cocoa mix is not only delicious but also makes for a heartwarming, thoughtful gift.
Print
Old-Fashioned Hot Cocoa Mix
- Prep Time: 10 minutes
- Cook Time: 0 minutes
- Total Time: 10 minutes
- Yield: About 3 cups mix (makes approximately 12 servings) 1x
- Category: Drink Mix
- Method: No-Cook Mixing
- Cuisine: American
- Diet: Vegetarian
Description
A simple and delicious homemade hot cocoa mix recipe that’s rich, creamy, and perfect for cozy winter nights or thoughtful gifts.
Ingredients
- 1 cup powdered sugar
- 3/4 cup unsweetened cocoa powder (Dutch-process or natural)
- 1 1/2 cups powdered milk
- 1/2 cup cornstarch
- 1/2 teaspoon salt
- Optional add-ins: 1 teaspoon cinnamon, mini marshmallows, 1 teaspoon instant coffee
Instructions
- Sift powdered sugar, cocoa powder, powdered milk, cornstarch, salt, and optional cinnamon into a large bowl.
- Stir the mixture thoroughly until all ingredients are completely combined and evenly distributed.
- Transfer the cocoa mix into an airtight container or glass jar for storage.
- To serve, stir 3 tablespoons of cocoa mix into 8 ounces of hot water or milk until fully dissolved and creamy.
- Add optional toppings such as whipped cream, marshmallows, or a sprinkle of cinnamon, then stir and enjoy.
Notes
- Store cocoa mix in an airtight container in a cool, dry place for up to 3 months.
- Stir the mix before use if ingredients settle at the bottom.
- Use glass jars for an attractive presentation and perfect for gifting.
- Customize your mix by adding mini chocolate chips, cayenne for a spicy kick, or crushed peppermint for holidays.
- Recommended Tools (affiliate links):
- Fine Mesh Sifter – for clump-free blending.
- Glass Mason Jars with Lids – for storing or gifting your mix.
- Silicone Spatula Set – for smooth mixing and transferring.
- Stainless Steel Measuring Cups & Spoons – for precise ingredient portions.
Nutrition
- Serving Size: 3 tablespoons
- Calories: 90
- Sugar: 18g
- Sodium: 50g
- Fat: 1g
- Saturated Fat: 0.5g
- Unsaturated Fat: 0.4g
- Trans Fat: 0g
- Carbohydrates: 20g
- Fiber: 2g
- Protein: 2g
- Cholesterol: 0g
Keywords: homemade hot cocoa mix, easy hot chocolate mix, DIY cocoa mix, winter drink recipe, cozy hot chocolate
FAQs
Absolutely! Mixing your hot cocoa with warm milk instead of water makes the drink creamier and more indulgent. It enhances the chocolate flavor and gives you that true cozy café experience at home.
Yes, you can. If you prefer using fresh milk, simply leave out the powdered milk in the mix. Just be sure to always mix the cocoa powder with hot milk instead of water for the creamy texture. This is a great option for those who want to avoid powdered dairy.
You can use either natural or Dutch-process cocoa powder, depending on your preference. Dutch-process cocoa has a smoother, richer flavor and a darker color, while natural cocoa is slightly more acidic and has a classic chocolate taste.
To make it dairy-free, use a non-dairy powdered milk alternative like coconut or soy milk powder. For gluten-free needs, ensure all ingredients are certified gluten-free (some powdered milk and cocoa powders may be processed in facilities with gluten).
Definitely! This recipe is easy to scale. Just keep the ingredient ratios the same and mix in a large bowl. Store in multiple containers or jars to enjoy or gift later.
Gift Idea: Homemade Cocoa Jars
Homemade cocoa jars make heartfelt, cozy gifts that everyone loves. Simply layer your hot cocoa mix into a clean glass jar, then top it with a handful of mini marshmallows for a fun and festive finish. You can even toss in a few chocolate chips, crushed peppermint, or a cinnamon stick for an extra-special touch.
Dress up the jar with a ribbon, twine, or holiday fabric, and don’t forget to include a tag with serving instructions—something like: “Mix 3 tablespoons with 1 cup of hot water or milk. Stir well. Enjoy!”
These jars are perfect for holiday gift baskets, teacher appreciation gifts, neighbor drop-offs, or self-care packages. They’re inexpensive, easy to make in batches, and add a thoughtful, homemade touch to any occasion. Plus, who wouldn’t love a warm mug of hot cocoa ready to go?
Conclusion
Homemade hot cocoa mix is such a simple way to bring cozy comfort to your day — rich, creamy, and completely customizable. Once you try making your own, you’ll never want to go back to store-bought again. It’s perfect for chilly nights, quick treats, or thoughtful gifts.
I’d love to hear how your batch turns out! Drop a comment below to share your experience or any tweaks you made. And if you snap a photo of your cocoa creation, tag me on Instagram or Pinterest — I’m always excited to see your cozy moments.
Don’t forget, these homemade cocoa jars also make amazing gifts to spread warmth and happiness to friends and family. So go ahead, mix up a batch, sip slowly, and share the joy!
Recipe by Nora, Choco Kitchen Blog


2 Comments