
Oreo Cake Balls: 7 Irresistible Steps to Joyful Treats
Oh my goodness, let me tell you about Oreo Cake Balls! These little bites of joy are like a party in your mouth! Imagine the classic taste of Oreo cookies combined with creamy goodness, all wrapped up in a luscious chocolate coating. Seriously, they’re the perfect no-bake treat for any occasion—whether you’re celebrating a birthday, hosting a casual get-together, or just treating yourself after a long day. I remember the first time I made these; I couldn’t keep my hands off them! They’re so easy to whip up, you won’t believe how simple the steps are. Trust me, once you take that first bite, you’ll be hooked! So, let’s dive into making these delightful treats together—you’ll be so glad you did!
Ingredients List
Gathering the right ingredients is key to making these scrumptious Oreo Cake Balls! Here’s what you’ll need:
- 36 Oreo cookies
- 8 oz softened cream cheese
- 16 oz chocolate coating (dark or white, your choice!)
Make sure that your cream cheese is softened to room temperature; this makes mixing everything together a breeze! You can use any flavor of Oreo you like, so feel free to get creative with your favorites. Trust me, you’re going to love how these come together!
How to Prepare Oreo Cake Balls
Getting ready to make these Oreo Cake Balls is super fun and easy! Just follow these straightforward steps, and you’ll have delicious treats in no time!
Step 1: Crush the Oreo Cookies
First things first, let’s crush those Oreo cookies! I like to use a food processor for this—it makes quick work of it! Just toss the whole cookies in (no need to separate the cream filling) and pulse until they’re finely crushed. You want a nice, sandy texture here, almost like the consistency of graham cracker crumbs. If you don’t have a food processor, you can also put them in a zip-top bag and crush them with a rolling pin. Just be careful not to get too aggressive; we want crumbs, not dust!
Step 2: Mix with Cream Cheese
Now, grab that softened cream cheese and combine it with the crushed Oreos in a large bowl. I like to use a spatula or a sturdy wooden spoon to mix everything together until it’s well-combined and there are no dry bits of cookie left. This is where the magic happens! The cream cheese should make the mixture creamy and cohesive—it’s like a delicious cookie dough!
Step 3: Roll into Balls
Once everything is mixed well, it’s time to roll! Take about a tablespoon of the mixture and roll it into a 1-inch ball. I find that using my hands works best for this, and it’s a bit messy, but that’s part of the fun! Try to keep them uniform in size so they all look adorable and cook evenly. Place the rolled balls on a plate or tray as you go.
Step 4: Chill the Balls
Now, pop those lovely little balls into the refrigerator for about 30 minutes. This chilling step is crucial because it helps them firm up, making them easier to dip later. Plus, they’ll taste even better when they’re nice and cold! Just don’t forget about them in there—go ahead and do a little happy dance while you wait!
Step 5: Melt the Chocolate Coating
While your cake balls are chilling, it’s time to melt the chocolate coating! You can do this in a microwave-safe bowl or a double boiler. If you’re using the microwave, go in 30-second intervals, stirring in between, until it’s completely melted and smooth. Be careful not to overheat it; burnt chocolate is a bummer! If you’re using a double boiler, let the chocolate melt slowly over simmering water, stirring until silky smooth.
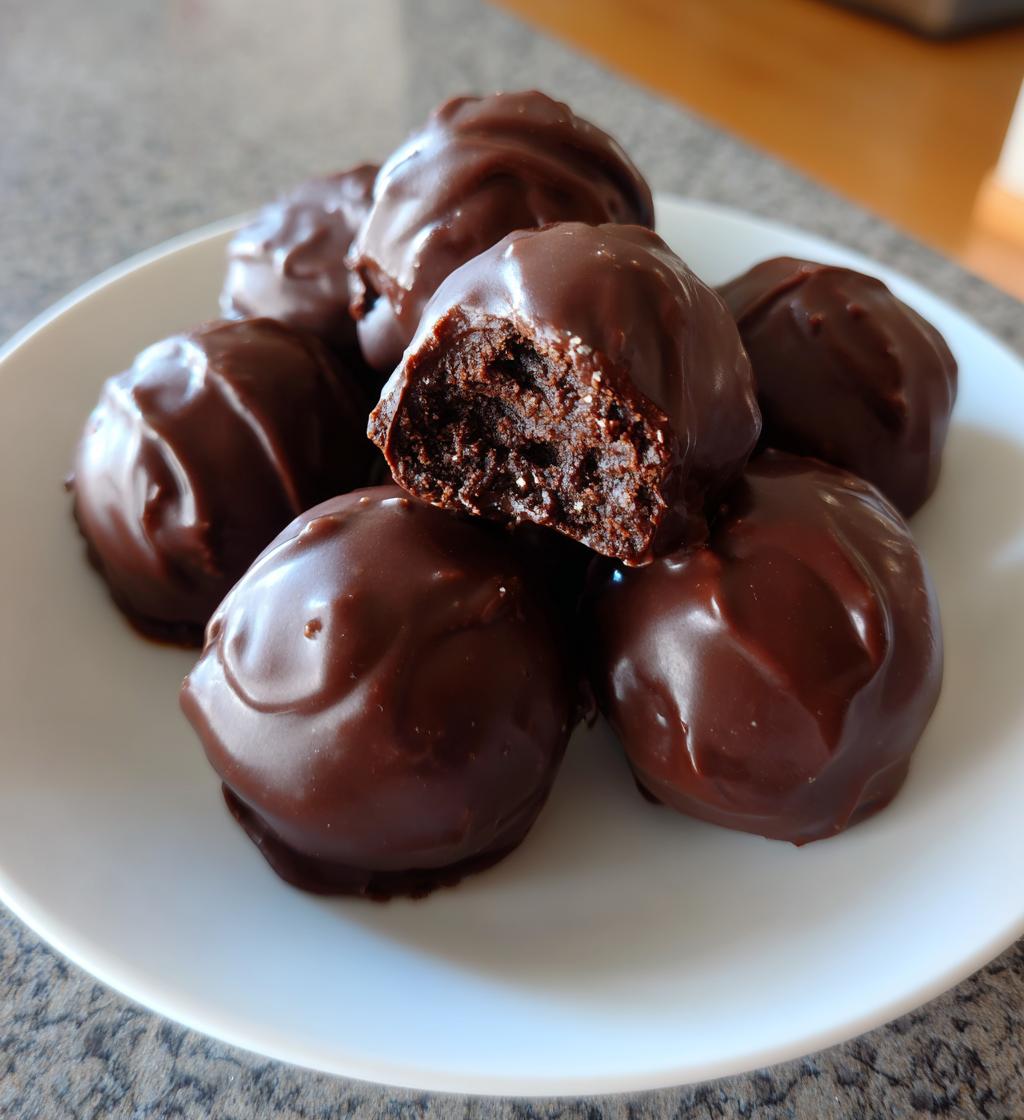
Step 6: Dip the Balls
Once your cake balls are chilled and your chocolate is melted, it’s time to dip! Using a fork, gently lower each ball into the melted chocolate, ensuring it’s completely coated. Let the excess chocolate drip off before transferring them back to the parchment paper. This is where you can get creative—feel free to drizzle some extra chocolate on top for decoration!
Step 7: Arrange on Baking Sheet
Speaking of parchment paper, line a baking sheet with it before placing your dipped cake balls on top. Make sure to space them out a bit so they don’t stick together. You want them to have their own little cozy spots to chill!
Step 8: Let Chocolate Set
Lastly, let the chocolate coating set before you dive in! This usually takes about 15-30 minutes at room temperature, or you can speed things up by popping them back in the fridge. Once they’re ready, you can serve them up and watch everyone’s eyes light up with delight!
Nutritional Information
Let’s talk about the nutrition of these delightful Oreo Cake Balls! Each cake ball is a little indulgence, and here’s what you can expect per serving:
- Calories: 120
- Sugar: 10g
- Sodium: 50mg
- Fat: 7g
- Saturated Fat: 4g
- Unsaturated Fat: 2g
- Trans Fat: 0g
- Carbohydrates: 14g
- Fiber: 0g
- Protein: 1g
- Cholesterol: 10mg
Keep in mind that these values are estimates and can vary based on the specific ingredients you choose. But hey, life is all about balance, right? Enjoy these treats in moderation, and you’ll be just fine! They’re so worth it for that delightful chocolatey, creamy bite!
Tips for Success
Ah, the secret to making these Oreo Cake Balls truly perfect lies in a few handy tips! Trust me, these little nuggets of wisdom can turn an already great recipe into something spectacular!
- Softened Cream Cheese: Make sure your cream cheese is at room temperature before mixing. This makes blending super easy and ensures a smooth, creamy texture. If you forget to take it out ahead of time, you can microwave it for about 10-15 seconds—just don’t let it melt!
- Get Creative with Oreos: Don’t feel limited to just the classic Oreos! Try using different flavors like mint, peanut butter, or even birthday cake Oreos for a fun twist. Each variation brings a unique taste that’ll keep everyone guessing and coming back for more!
- Chill, Chill, Chill: Don’t skip the chilling step! It really helps the balls firm up, making them easier to coat in chocolate. If you find they’re a bit too soft after mixing, you can chill the mixture for a bit before rolling.
- Use Quality Chocolate: The chocolate coating is where a lot of flavor comes from, so opt for a good quality chocolate. Whether you prefer dark, milk, or white chocolate, make sure it’s something you love to eat on its own!
- Don’t Rush the Dipping: When dipping your cake balls, take your time! A fork works great for this, allowing you to fully coat each ball. Let any excess chocolate drip off before placing them on the parchment paper.
With these tips in your back pocket, you’ll be well on your way to making Oreo Cake Balls that are not just tasty but absolutely irresistible! Happy baking!
Variations of Oreo Cake Balls
Now, let’s get a bit adventurous with these Oreo Cake Balls! The beauty of this recipe is that it’s super versatile, so you can easily switch things up and make them your own. Here are some fun variations that I love:
- Chocolate Lovers: If you’re a chocolate fanatic like me, try using chocolate-covered Oreos for an extra chocolatey kick! You can also mix in some cocoa powder into the cream cheese mixture for a deeper flavor.
- Nutty Delight: Add a sprinkle of crushed nuts—like almonds or hazelnuts—into the mixture for a delightful crunch. You can even roll the finished cake balls in chopped nuts instead of chocolate for a unique finish!
- Minty Fresh: For a refreshing twist, use mint-flavored Oreos and dip the balls in white chocolate. You can even add a few drops of peppermint extract to the cream cheese mixture for that extra minty goodness!
- Rainbow Fun: Want to make them festive? After dipping the cake balls in chocolate, sprinkle them with colorful sprinkles or edible glitter. They’re perfect for birthdays or any celebration!
- Seasonal Flavors: Experiment with seasonal Oreos—like pumpkin spice in the fall or peppermint in the winter. Each flavor variation brings a new vibe to your cake balls!
Feel free to mix and match these ideas or come up with your own creations! The only limit is your imagination. I can’t wait to hear what delicious twists you come up with!
Storage & Reheating Instructions
Storing your leftover Oreo Cake Balls is super simple! Just pop them into an airtight container and keep them in the refrigerator. They’ll stay fresh and delicious for up to a week—if they last that long, that is! Trust me, they’re just too tempting to resist!
If you want to keep them even longer, you can freeze them! Just make sure to individually wrap each cake ball in plastic wrap before placing them in a freezer-safe bag or container. They’ll be good for up to two months, and when you’re ready to enjoy them, just take them out and let them thaw in the fridge for a few hours. No need to reheat—these little treats are best served chilled!
So, whether you’re enjoying a few right away or saving some for later, these Oreo Cake Balls are sure to bring joy whenever you indulge! Happy snacking!
FAQ Section
Can I use different types of chocolate for coating?
Absolutely! You can use dark, milk, or white chocolate depending on your preference. Each type brings its unique flavor to the Oreo Cake Balls, so feel free to experiment until you find your favorite!
What if I don’t have a food processor?
No worries! You can crush the Oreo cookies by placing them in a zip-top bag and using a rolling pin to break them down. Just be mindful not to crush them too finely; you want a nice crumb texture for the best results!
How should I store leftover Oreo Cake Balls?
Keep your leftover Oreo Cake Balls in an airtight container in the refrigerator for up to a week. If you want to save them for longer, you can freeze them! Just wrap each ball in plastic wrap and store them in a freezer-safe container.
Can I make these ahead of time?
Definitely! Oreo Cake Balls are perfect for making a day or two in advance. Just make sure to store them properly in the fridge so they stay fresh and delicious until you’re ready to serve them!
Why did my chocolate coating crack?
Cracking can happen if the chocolate is overheated or if the cake balls are too cold when you dip them. Make sure to melt your chocolate gently and let your chilled balls sit at room temperature for a few minutes before dipping. This should help you achieve that perfect smooth coating!

Oreo Cake Balls: 7 Irresistible Steps to Joyful Treats
- Prep Time: 20 minutes
- Cook Time: 10 minutes
- Total Time: 1 hour
- Yield: 24 cake balls 1x
- Category: Dessert
- Method: No-bake
- Cuisine: American
- Diet: Vegetarian
Description
Oreo cake balls are a delicious dessert made from crushed Oreo cookies mixed with cream cheese, rolled into balls, and coated in chocolate.
Ingredients
- 36 Oreo cookies
- 8 oz cream cheese, softened
- 16 oz chocolate coating (dark or white)
Instructions
- Crush the Oreo cookies in a food processor.
- Mix the crushed cookies with softened cream cheese until well combined.
- Roll the mixture into 1-inch balls.
- Chill the balls in the refrigerator for 30 minutes.
- Melt the chocolate coating in a microwave or double boiler.
- Dip each ball into the melted chocolate, coating completely.
- Place the coated balls on a baking sheet lined with parchment paper.
- Let the chocolate set before serving.
Notes
- Use any flavor of Oreo for variety.
- Store in an airtight container in the refrigerator.
- Drizzle with extra chocolate for decoration.
Nutrition
- Serving Size: 1 cake ball
- Calories: 120
- Sugar: 10g
- Sodium: 50mg
- Fat: 7g
- Saturated Fat: 4g
- Unsaturated Fat: 2g
- Trans Fat: 0g
- Carbohydrates: 14g
- Fiber: 0g
- Protein: 1g
- Cholesterol: 10mg
Keywords: Oreo Cake Balls, dessert, no-bake, chocolate, cookies


