
Red Velvet Waffles: 7 Irresistible Delights to Savor
Oh my goodness, let me tell you about my love for Red Velvet Waffles! These beauties are not just your average breakfast treat; they’re a delightful twist on the classic red velvet cake, and trust me, they’re every bit as delicious! The moment you take a bite, you’ll be greeted with a subtle hint of cocoa and that signature velvety texture that just melts in your mouth. Seriously, it’s like brunch and dessert all rolled into one fabulous dish!
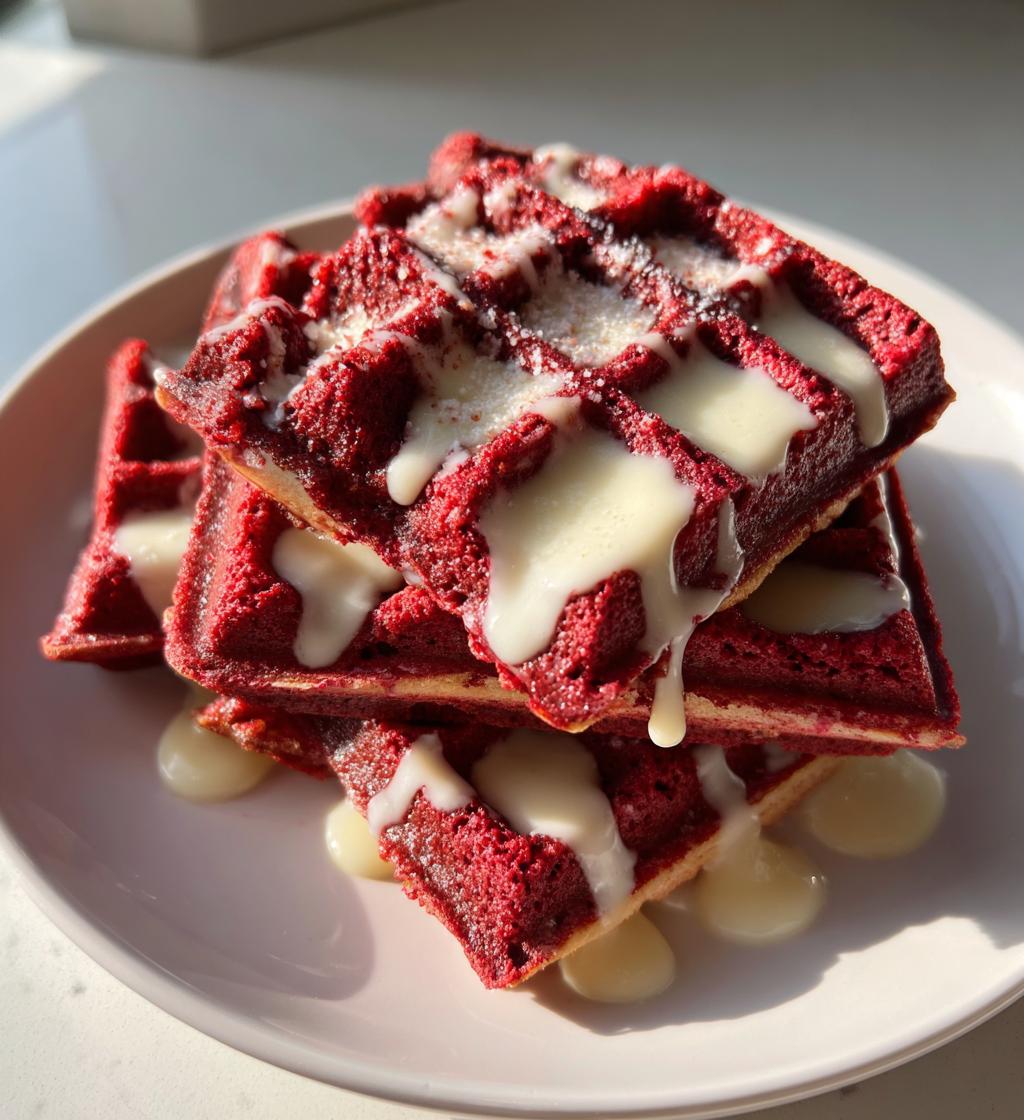
I remember the first time I made them—my kitchen was a whirlwind of flour and cocoa powder, and the anticipation was palpable. When they came out of the waffle iron, perfectly golden and slightly crisp on the outside, I couldn’t resist drizzling them with cream cheese frosting. Wow! The combination of flavors is simply divine, and I promise, these waffles will impress everyone, whether it’s a cozy family breakfast or a special occasion brunch.
So, if you’re ready to elevate your waffle game and indulge in something truly special, stick with me! You won’t regret diving into this deliciously decadent recipe for Red Velvet Waffles.
Ingredients for Red Velvet Waffles
You’re going to love how simple these ingredients are! Here’s everything you’ll need to whip up a batch of my delicious Red Velvet Waffles:
- 1 cup all-purpose flour: This is the base of your waffles, giving them that fluffy structure.
- 1/4 cup cocoa powder: Just the right amount to add a rich, chocolatey flavor without overpowering the red velvet taste.
- 1 tablespoon sugar: A little sweetness to complement the cocoa and balance the flavors.
- 1 teaspoon baking powder: This helps the waffles rise and become nice and fluffy.
- 1/2 teaspoon baking soda: Essential for that perfect texture—don’t skip it!
- 1/4 teaspoon salt: Just a pinch to enhance all the flavors, trust me on this one!
- 1 large egg: This binds everything together and adds richness.
- 1 cup buttermilk: It gives the waffles a tender crumb and a slight tang—so good!
- 1/4 cup vegetable oil: For moisture and to keep things from sticking.
- 1 tablespoon red food coloring: This is what gives our waffles that signature red hue! Adjust it to your liking.
- 1 teaspoon vanilla extract: A dash of vanilla adds wonderful depth to the flavor.
And there you have it! Gather these ingredients, and you’ll be one step closer to enjoying some scrumptious Red Velvet Waffles. Let’s get cooking!
How to Prepare Red Velvet Waffles
Now that you’ve got your ingredients ready, let’s dive into the fun part—making those gorgeous Red Velvet Waffles! I promise you, it’s easier than you might think. Just follow these steps, and you’ll be flipping waffles like a pro in no time!
Step-by-Step Instructions
- First things first, grab a large mixing bowl and combine the dry ingredients: all-purpose flour, cocoa powder, sugar, baking powder, baking soda, and salt. Use a whisk to mix them together until they’re well blended. It’s all about that fluffy texture!
- In a separate bowl, whisk together the wet ingredients: crack that large egg, then add the buttermilk, vegetable oil, red food coloring, and vanilla extract. Give it a good whisk until everything is combined and looks like a beautiful red mixture.
- Now, it’s time to bring the two bowls together! Pour the wet mixture into the bowl with the dry ingredients. Gently stir with a spatula or wooden spoon until just combined. Don’t overmix—some lumps are totally okay! We want our waffles to stay light and airy.
- While you’re mixing, preheat your waffle iron according to the manufacturer’s instructions. This is super important because you want it hot and ready to go for that perfect golden brown finish!
- Once your waffle iron is hot, lightly grease it with non-stick spray or a bit of vegetable oil. This will ensure your waffles release effortlessly!
- Pour the batter into the center of the preheated waffle iron, using about half a cup for each waffle (or according to your waffle iron’s size). Close the lid and let it cook! It usually takes about 3 to 5 minutes, but keep an eye on it. You want them to be golden brown and slightly crispy on the outside.
- When they’re done, carefully remove the waffles and keep them warm while you repeat the process with the remaining batter. I like to stack them on a plate and cover them with a clean towel to keep them cozy.
- Finally, serve your fabulous Red Velvet Waffles with a drizzle of cream cheese frosting or syrup. Oh my goodness, you’re in for a treat!
And just like that, you’ve made a batch of stunning Red Velvet Waffles! Enjoy every delicious bite, and don’t forget to share with your loved ones (or keep them all to yourself, I won’t judge!).
Why You’ll Love This Recipe
- Unique Flavor: These Red Velvet Waffles bring that classic red velvet cake taste right to your breakfast table, with a delightful hint of cocoa that makes them truly special.
- Easy to Prepare: With just a few simple steps, you’ll have a batch of scrumptious waffles in no time, making them perfect for both busy mornings and leisurely brunches.
- Perfect for Special Occasions: Whether it’s Valentine’s Day, a birthday, or just a fun weekend treat, these waffles add a touch of festive flair that’s sure to impress.
- Customizable: Top them with cream cheese frosting, fresh berries, or a drizzle of maple syrup—there’s no wrong way to enjoy these beauties!
- Kid-Friendly: The vibrant color and sweet flavor make these waffles a hit with kids and adults alike. Who can resist a red velvet treat?
- Brunch Showstopper: Serve these at your next brunch gathering, and watch your friends and family rave about them—they’ll be the talk of the table!
Tips for Success with Red Velvet Waffles
Want to take your Red Velvet Waffles from great to absolutely glorious? I’ve got some handy tips that’ll help you nail this recipe every single time. Trust me, a little extra attention can make all the difference!
- Don’t Overmix: When combining the wet and dry ingredients, remember that less is more! Overmixing can lead to tough waffles. Just mix until everything is combined, and you’ll be golden!
- Temperature Matters: Make sure your waffle iron is properly preheated before adding the batter. A hot iron ensures that the waffles cook evenly and develop that perfect crispiness on the outside.
- Test for Doneness: Every waffle iron is a bit different, so keep an eye on your waffles. Look for a golden brown color and listen for that lovely sizzle—when it quiets down, they’re likely ready!
- Keep Waffles Warm: If you’re making a big batch, keep your cooked waffles warm in a low oven (around 200°F or 93°C) while you finish cooking the rest. This way, everyone gets to enjoy them fresh and warm!
- Adjust the Red: If you want a more vibrant color, feel free to adjust the amount of red food coloring. Just remember, a little goes a long way, so start with a tablespoon and see how you like it!
- Experiment with Toppings: The cream cheese drizzle is a classic, but don’t be afraid to get creative! Try fresh fruit, whipped cream, or even a sprinkle of chopped nuts for added texture and flavor.
- Make It Ahead: You can prep the dry ingredients in advance and store them in an airtight container. When you’re ready to make the waffles, just whisk up the wet ingredients and combine. Super convenient!
With these tips in your back pocket, you’re all set to create the most delightful Red Velvet Waffles ever. Happy cooking, and enjoy every delicious bite!
Nutritional Information
Alright, let’s talk about the numbers! Here’s the estimated nutritional breakdown for one delicious Red Velvet Waffle. Keep in mind, these values can vary a bit based on the specific ingredients you use, but this should give you a good idea:
- Calories: 250
- Fat: 10g
- Saturated Fat: 1.5g
- Unsaturated Fat: 8.5g
- Trans Fat: 0g
- Cholesterol: 45mg
- Sodium: 300mg
- Carbohydrates: 35g
- Fiber: 2g
- Sugar: 10g
- Protein: 5g
So there you have it! A sweet treat that’s not only delightful but also gives you a boost of energy to kickstart your day or satisfy that brunch craving. Enjoy these scrumptious Red Velvet Waffles guilt-free, and remember, balance is key in any delicious breakfast!
FAQ about Red Velvet Waffles
Got questions about making the perfect Red Velvet Waffles? Don’t worry, I’ve got you covered! Here are some of the most common queries I get, along with my answers to help you out:
Can I make these waffles without buttermilk?
Absolutely! If you don’t have buttermilk on hand, you can easily substitute it with a mix of regular milk and a splash of vinegar or lemon juice. Just let it sit for about 5 minutes before using it in your recipe!
What can I use instead of red food coloring?
If you prefer a natural option, you can use beet juice or powdered beetroot. Just keep in mind that the color might not be as vibrant, but it will still give you that lovely red hue!
How can I make my waffles extra crispy?
For extra crispy waffles, try letting the batter sit for a few minutes before cooking. Also, make sure your waffle iron is really hot, and consider cooking them a bit longer if your iron allows it. Crispy edges are just the best!
Can I freeze leftover Red Velvet Waffles?
Yes, you can! Just let them cool completely, then wrap each waffle in plastic wrap or foil and store them in an airtight container in the freezer. When you’re ready to enjoy them, pop them in the toaster or oven to reheat!
What toppings work best with Red Velvet Waffles?
Oh, the possibilities are endless! Classic cream cheese frosting is a must, but you can also try whipped cream, fresh berries, chocolate syrup, or even a sprinkle of powdered sugar. Get creative and make it your own!
How do I know when my waffles are done?
Most waffle irons have an indicator light that will tell you when they’re done, but if not, look for a golden brown color and listen for that lovely sizzle to fade. If they’re steaming a lot, give them a bit more time!
Can I make these waffles ahead of time?
Definitely! You can prepare the batter ahead of time and store it in the fridge for a few hours. Just give it a quick stir before pouring it into the waffle iron. Perfect for busy mornings!
I hope these FAQs help you on your journey to delicious Red Velvet Waffles! If you have any other questions, feel free to ask. Happy cooking!
Storage & Reheating Instructions
So, you’ve made a batch of those delightful Red Velvet Waffles and have some leftovers? No worries, I’ve got you covered on how to store them properly so you can enjoy them later! It’s all about keeping that deliciousness intact.
To store your leftover waffles, let them cool completely on a wire rack. This step is super important because it prevents them from getting soggy—nobody wants that! Once they’re cool, you can stack them up and wrap them tightly in plastic wrap or place them in an airtight container. They’ll keep well in the fridge for about 3 to 4 days. If you want to keep them for longer, you can freeze them!
For freezing, just follow the same cooling instructions, then wrap each waffle individually in plastic wrap and place them in a freezer-safe bag or container. They can last up to 2 months in the freezer. Trust me, having a stash of these beauties ready to go is a game-changer!
When you’re ready to enjoy your waffles again, reheating is super easy! If you’ve frozen them, just pop them in the toaster or oven (350°F or 175°C) until they’re warmed through and crispy again—about 5 to 10 minutes should do the trick. If they were in the fridge, a quick zap in the microwave for about 20-30 seconds works just fine, but I recommend giving them a quick toast afterward for that lovely crispiness.
And there you have it! With these simple storage and reheating tips, you can savor your scrumptious Red Velvet Waffles anytime you want. Enjoy every bite!
Serving Suggestions for Red Velvet Waffles
Now that you’ve got your stunning Red Velvet Waffles ready to go, let’s talk about what to serve alongside them to take your breakfast (or brunch!) to the next level! Trust me, these pairings will enhance the experience and make your meal feel even more special.
- Cream Cheese Drizzle: Of course, you can’t go wrong with a generous drizzle of cream cheese frosting! It adds that rich, sweet touch that perfectly complements the waffles.
- Fresh Berries: Top your waffles with a medley of fresh strawberries, blueberries, or raspberries. The tartness of the berries balances the sweetness and adds a pop of color!
- Whipped Cream: Fluffy whipped cream is always a winner! It’s light, airy, and adds an indulgent touch that pairs beautifully with the rich flavor of the waffles.
- Maple Syrup: Don’t forget the classic! A warm drizzle of maple syrup will bring everything together, adding that lovely sweetness that everyone loves.
- Nuts: For a bit of crunch, sprinkle some chopped pecans or walnuts on top. It adds a delightful texture and nutty flavor that contrasts nicely with the soft waffles.
- Chocolate Chips: If you’re feeling extra indulgent, toss some mini chocolate chips on top while the waffles are still warm. They’ll melt slightly and create a heavenly chocolatey treat!
- Ice Cream: Don’t shy away from dessert for breakfast! A scoop of vanilla or cream cheese ice cream on top of warm waffles is a decadent treat that’s hard to resist.
Feel free to mix and match these suggestions or let your creativity run wild! The beauty of Red Velvet Waffles is that they’re versatile and can be dressed up for any occasion. Enjoy your delicious creations and happy serving!
Print
Red Velvet Waffles: 7 Irresistible Delights to Savor
- Prep Time: 10 minutes
- Cook Time: 15 minutes
- Total Time: 25 minutes
- Yield: 4 servings 1x
- Category: Breakfast
- Method: Waffle making
- Cuisine: American
- Diet: Vegetarian
Description
Delicious red velvet waffles with a hint of cocoa and cream cheese drizzle.
Ingredients
- 1 cup all-purpose flour
- 1/4 cup cocoa powder
- 1 tablespoon sugar
- 1 teaspoon baking powder
- 1/2 teaspoon baking soda
- 1/4 teaspoon salt
- 1 large egg
- 1 cup buttermilk
- 1/4 cup vegetable oil
- 1 tablespoon red food coloring
- 1 teaspoon vanilla extract
Instructions
- In a bowl, mix flour, cocoa powder, sugar, baking powder, baking soda, and salt.
- In another bowl, whisk egg, buttermilk, oil, food coloring, and vanilla.
- Combine wet and dry ingredients until just mixed.
- Preheat your waffle iron.
- Pour batter into the waffle iron and cook until golden brown.
- Serve with cream cheese drizzle or syrup.
Notes
- Adjust food coloring for desired redness.
- Use non-stick spray on the waffle iron for easy removal.
Nutrition
- Serving Size: 1 waffle
- Calories: 250
- Sugar: 10g
- Sodium: 300mg
- Fat: 10g
- Saturated Fat: 1.5g
- Unsaturated Fat: 8.5g
- Trans Fat: 0g
- Carbohydrates: 35g
- Fiber: 2g
- Protein: 5g
- Cholesterol: 45mg
Keywords: Red Velvet Waffles


